The use of Artificial Intelligence has increasingly occupied spaces with various application possibilities, whether in creating texts, images, videos, among other forms, for both personal and professional use. However, having to repeat the same commands every time we use AI can lead to unnecessary rework.
To save time and simplify requests to an AI, we created our templates. The ability to build a template allows anyone to adapt their AI to be more useful in their daily life, whether for specific tasks, at work, or at home. Below is a list of topics that will be covered in this article:
At Tess, it’s easy to find the ideal template for your needs. Any user can train their own AI and you can explore the templates created by them and by the Pareto team in the "Marketplace" tab, available in the "Community".
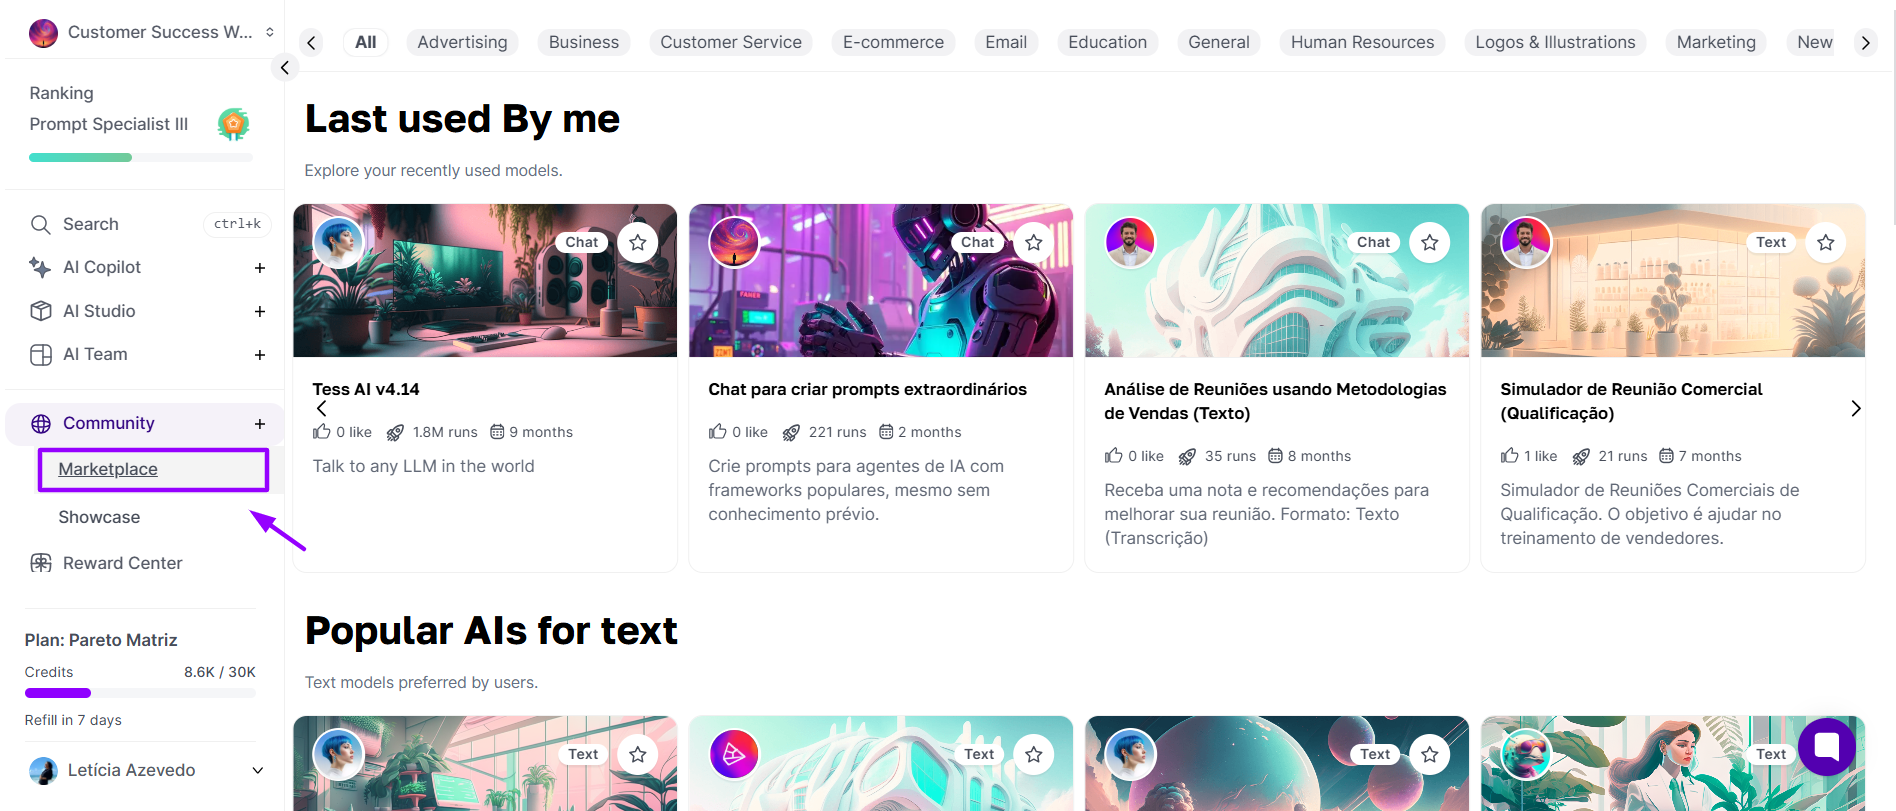
You can filter the templates by themes, which we call 'categories' on the platform, allowing you to find AIs trained in specific areas such as marketing, sales, e-commerce, customer service, design, music, and much more.
While browsing the templates, you will find a variety of options ready to use. For example, if you are a marketing professional, you can find templates that help automate tasks such as data analysis, campaign creation, or content generation. If you are an e-commerce entrepreneur, you can find templates to manage orders, track inventory, or provide customer support.
The templates are designed to simplify and accelerate your daily tasks, allowing you to make the most of AI without the need to create everything from scratch. Explore the possibilities and find the perfect template to boost your productivity and achieve extraordinary results.
If you can’t find a template that meets your needs, don’t worry! At Tess AI, we offer the option to train your own AI and develop a personalized template to perfectly fit your routine. Simply go to the "AI Studio" area and click on the Add New Agent button. This way, you will have full control over the features and customization of your AI, allowing it to fully adapt to your specific demands.

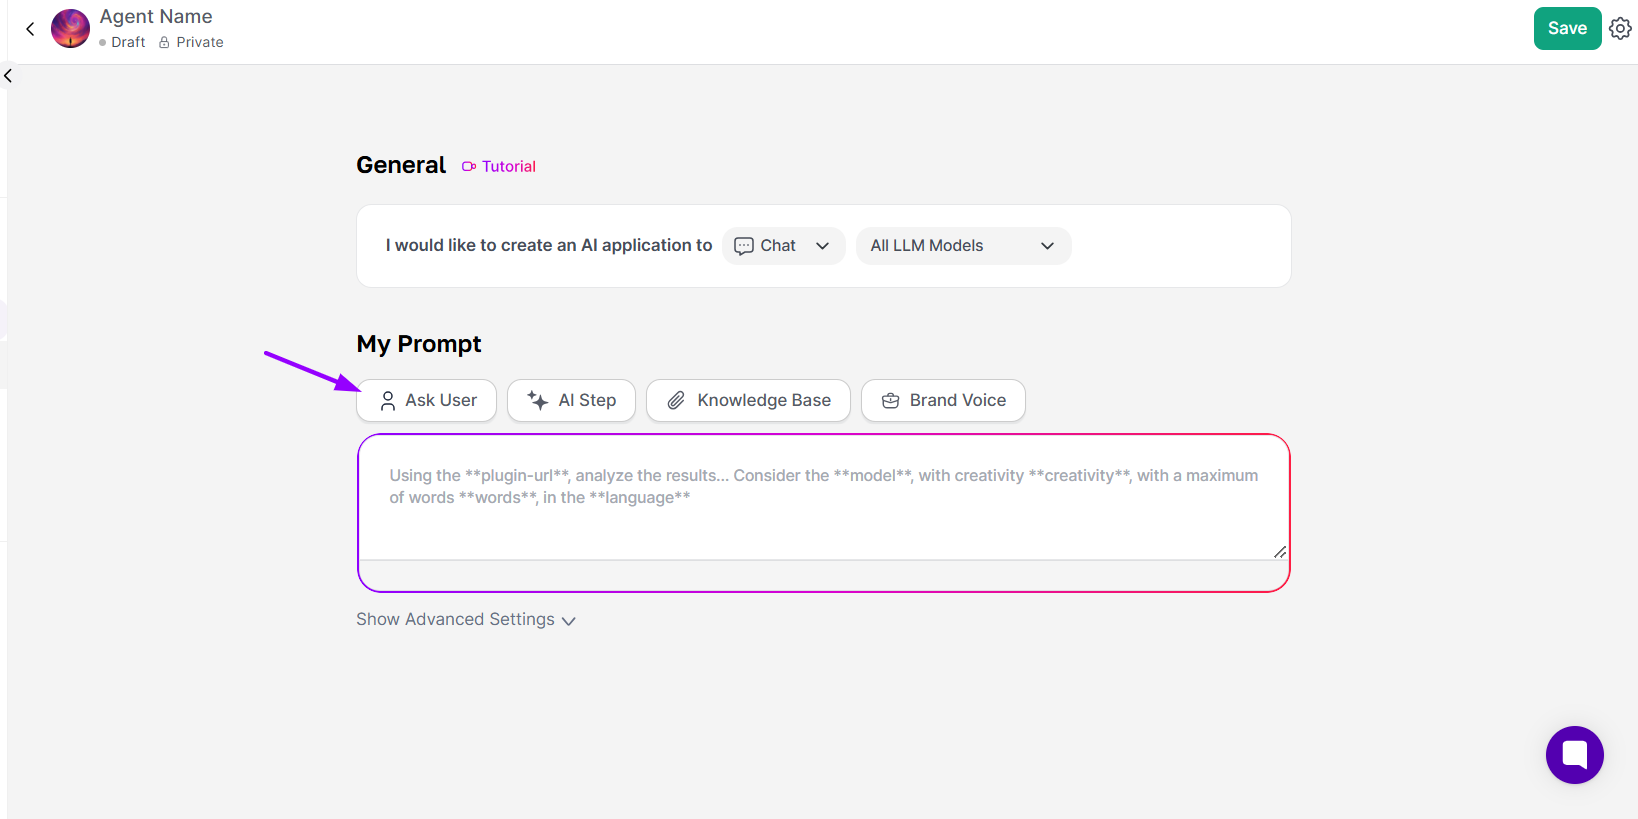
The creation of your personalized model starts with defining what you want to achieve. You should begin by describing your model by adding a title and a description, as well as specifying if it will be targeted toward chat, text, image, or video.
Of course, don’t forget to name your template in the top right corner!
Then, you can choose whether your model will follow a specific AI Model or consider all possible ones. These initial steps are fundamental to ensure that your model is approved for publication and that other users can understand what your template does.
At this stage, you will define the information that needs to be provided for your template to work properly. For the user, this will appear in the template as fields they need to fill in before using it, such as in the example below, which shows an image creation template asking the user what they want to generate, in what art style, and with what type of lighting.
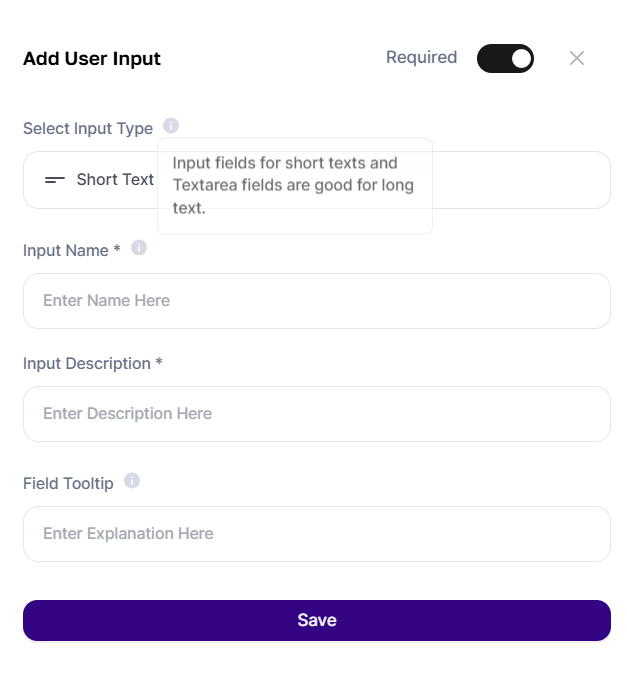
By providing these fields for the user to fill in, you allow greater customization and adaptability of the template to individual preferences. This ensures that the final result is exactly what the user desires.
Take this stage to define the necessary fields according to the type of template you are creating. Make sure to guide the user on which information is relevant and how to fill it out properly. This way, you will ensure a good result for your template and provide a good experience to those who use it.
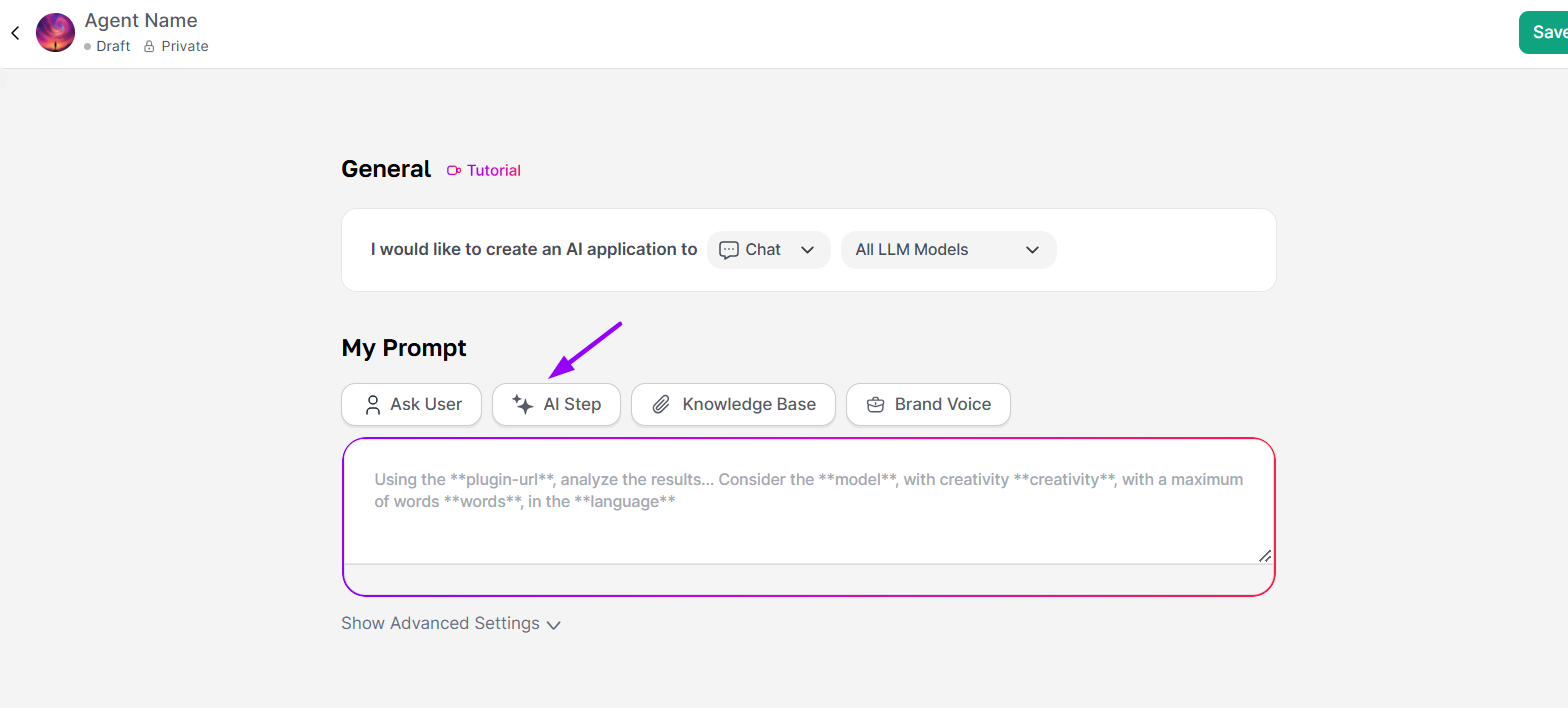
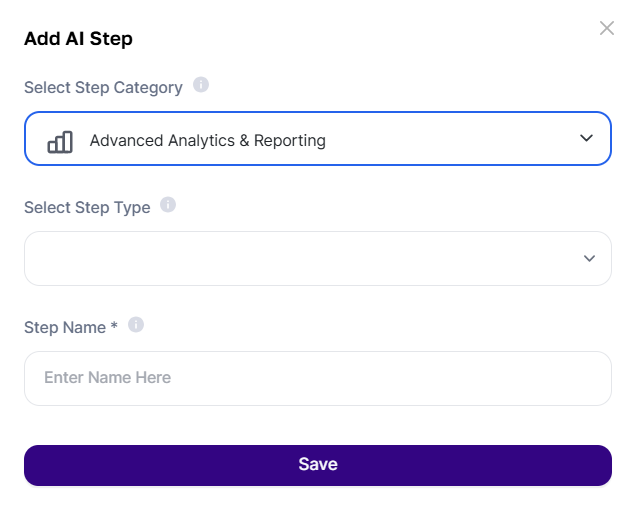
The advanced steps are optional but powerful features within Tess AI's AI Studio, allowing you to add more complex functionalities to your AI templates. They are useful when you need the AI to process information from various sources before generating the final output. Imagine, for example, that you want to create a template that generates a product description using a PDF with information about it. Simply uploading the PDF as input is not enough; the AI first needs to read and interpret the content of the PDF. This is where the advanced steps come into play.
Examples of advanced steps include:
PDF text extraction: Extracts raw text from a PDF.
Image reading with OCR (Optical Character Recognition): Extracts text from images within a PDF.
Reading PDFs with selected pages: Allows specifying the pages of the PDF that the AI should process.
Web scraping: Extracts information from web pages. This can include tasks ranging from reading a specific article to gathering product data on an e-commerce site.
Google search: Performs Google searches and uses the results as input for the AI.
Image Creation: Creates images based on template content.
Integration with apps: Allows integration with various apps, such as Excel, Sheets, Drive, Google Ads, Meta Ads...
You define a sequence of actions, as the user provides an input (e.g., a PDF or a URL), the AI executes the step corresponding advanced task (e.g., text extraction or web scraping) and then uses the extracted information to generate the final result, based on the prompt you configured.
It is important to remember that each step adds a stage to the process, which could increase processing time. Therefore, it is crucial to use steps only when necessary, choosing the type of step that best suits your needs.
It is also relevant to integrate the steps into the AI's prompt, so that it processes the information effectively. In other words, it is not enough to merely add an advanced step; you need to instruct the AI on how to use the data it provides. And that is what we will discuss below.
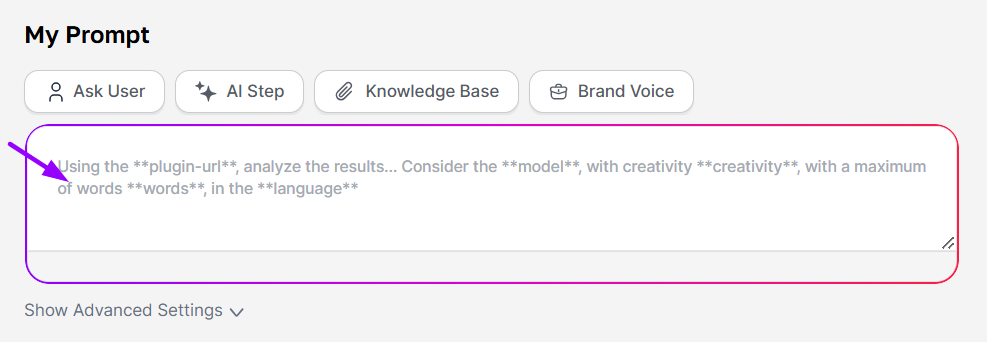
At this stage, you will customize the AI's actions and determine the functionalities of your template. You can use the inputs provided by the user to customize your prompt and adapt it to various situations - To do this, simply click on the "+" next to the input or Step.
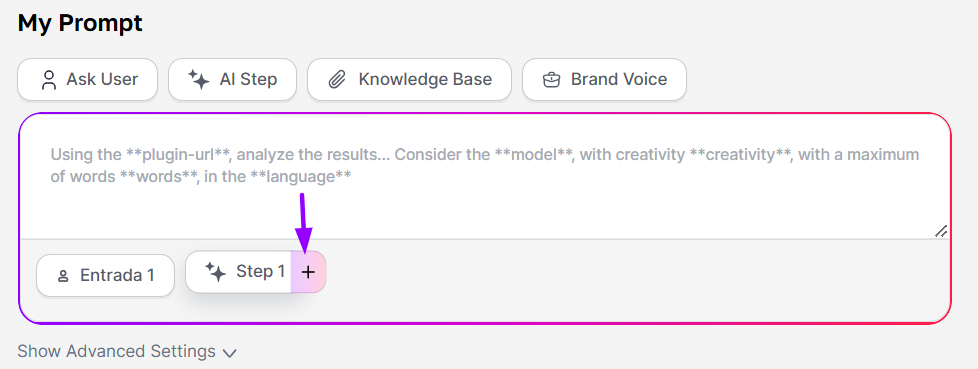
In the example above, we can see how the template creator can use the input "input 1" and the advanced step "step 1" to compose the structure of their prompt. The user will fill in the Inputs whenever they wish to use the template, and if applied to the prompt, the AI will also use the Step for this purpose.
By using the information provided by the user, you ensure that the prompt is personalized and meets the individual needs of each user, in various different contexts.
Finally, we have the brand voice, where you add details and characteristics of your brand, and use it for an even more personalized job by the AI!
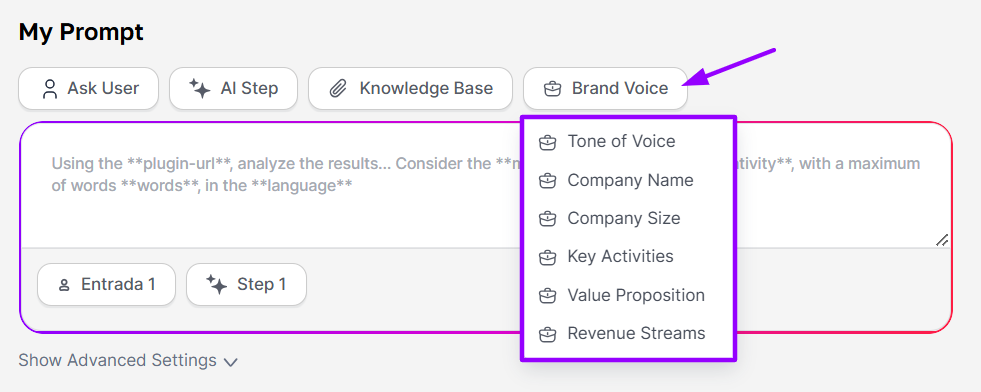
Simply add it to the beginning or end of the prompt for easy understanding by the AI.
Once the structure is ready, just save your template in the top-right corner, then review and test it to publish.

To publish, simply access your AI Studio and complete the publication by clicking on the option Publish Status and publishing it!
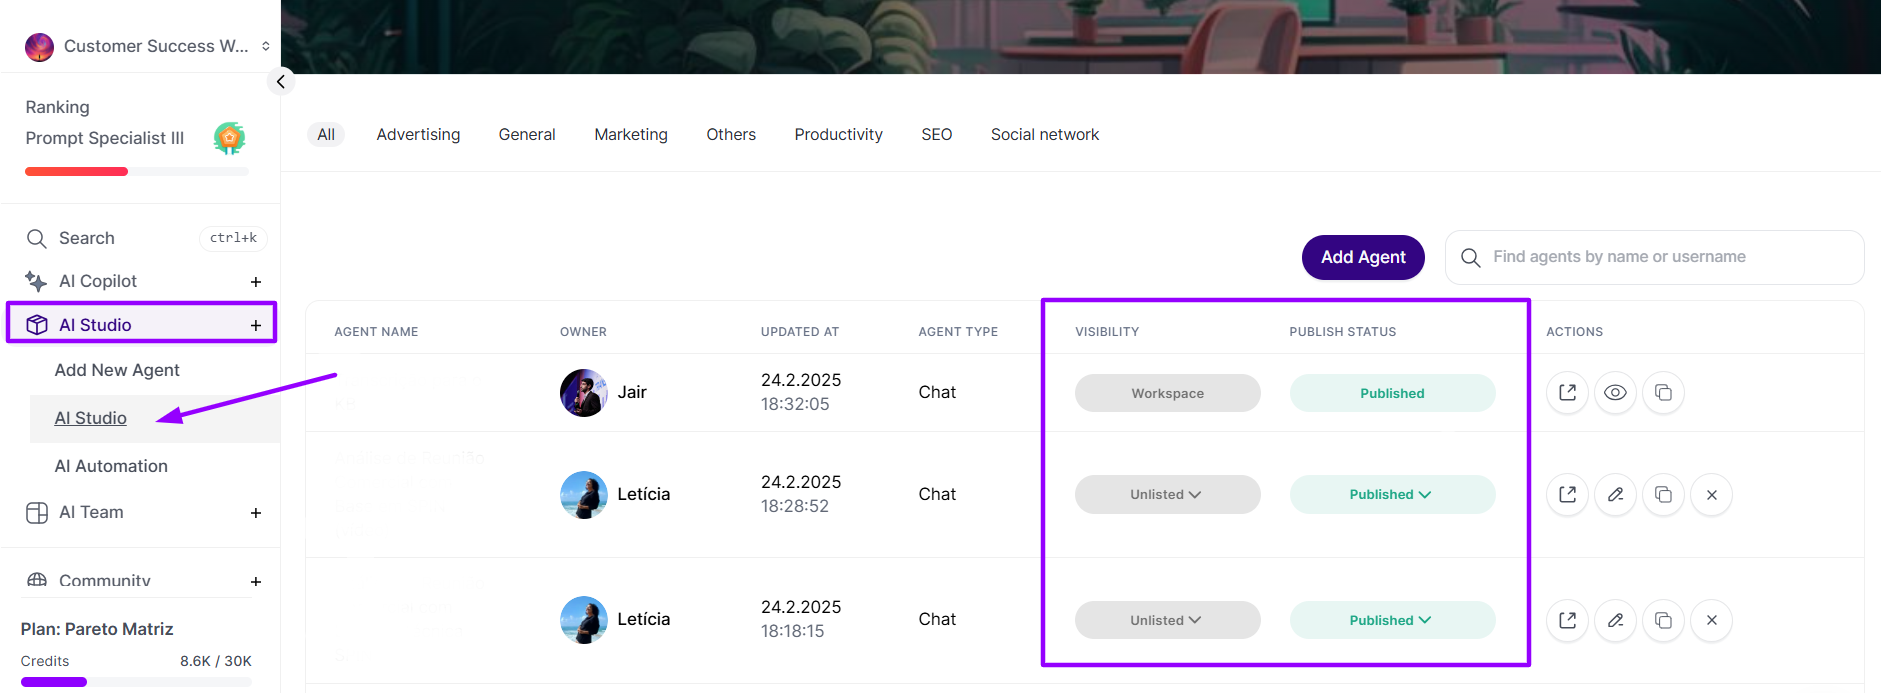
Then, just add:
Model Description: Describe the purpose and characteristics of your model here!
Visibility: Public, private, unlisted, or restricted to your Workspace
Category: Exactly as it will appear in the category structure within the Marketplace
Cover Image: Upload the cover image for your template here
Monetization: If you'd like to monetize your template, simply add cost and usage details!
Finally, just save it!
If you want to delve deeper into template creation and develop models for more complex tasks, we recommend checking out the two articles below. They provide detailed information and step-by-step guidance to help you create advanced templates in Tess AI.
Create Your Text AI with Tess AI
Learn how to develop a text-specialized AI using Tess AI tools in a simple way.
🎥Create Your Image AI with Tess AI🗒️
Follow our guide to develop an AI focused on image processing using Tess AI.
As a reminder, don't forget to add an attractive cover and select the category your model belongs to. These final steps are essential to ensure your model is approved and to help other users understand the purpose of your template. Enjoy!
