In this tutorial, we will explain in more detail the types of user input and how to use them, while showing how to create a travel planning agent that perfectly adapts to your wishes and preferences.
To begin your discovery in Tess AI, we will address two input groups and their applications in a template, which are:
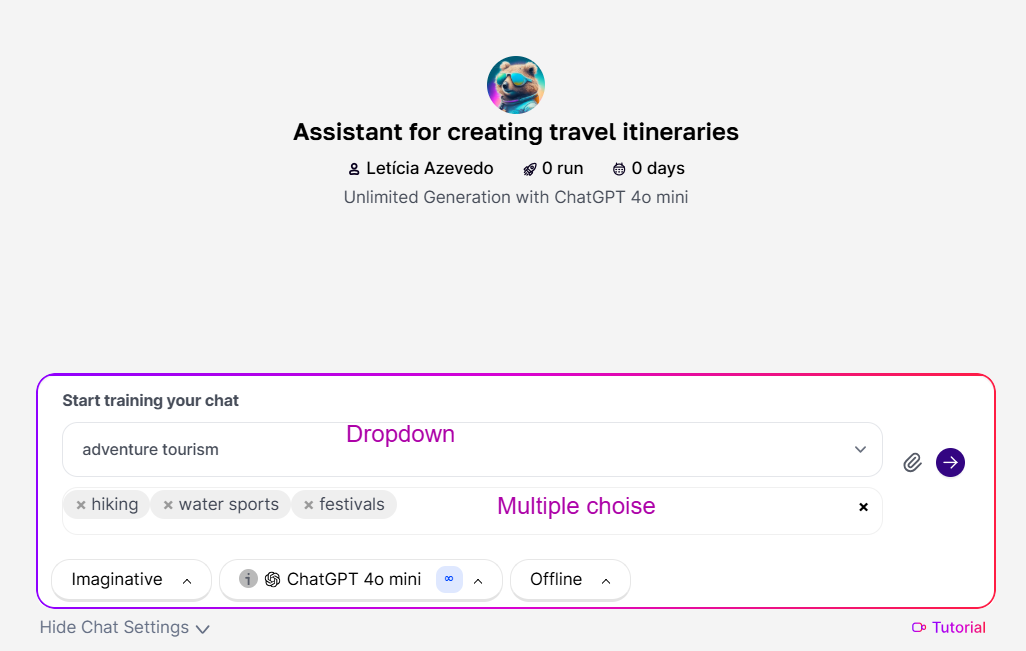
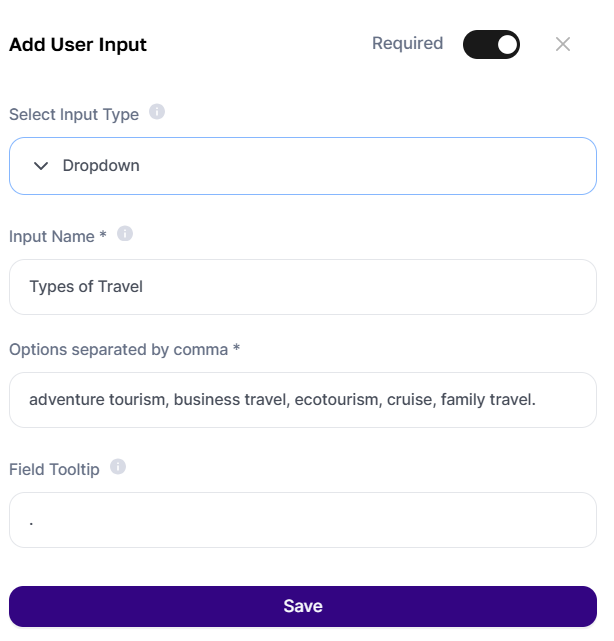
- Single-Select Dropdown: if you want to limit the user's response to just one from a list of options, simply type each one separated by commas in the input description.
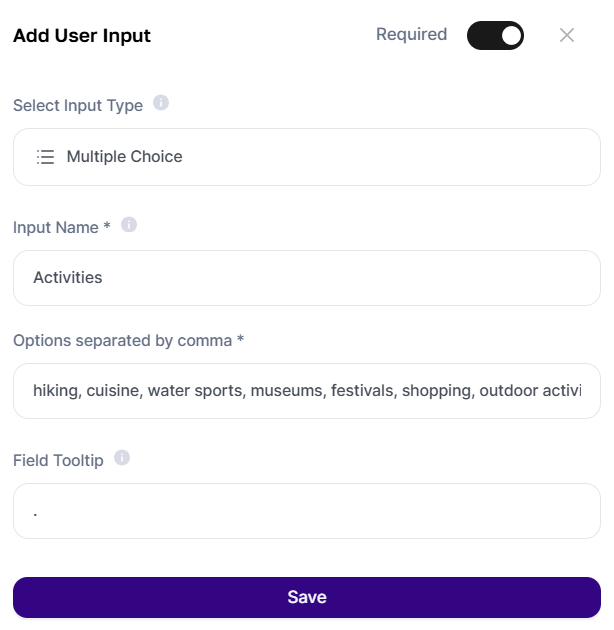
- Multi-Select Dropdown: if you do not want to limit the user's response, create a list of options by typing each one separated by commas in the input description. The user can choose more than one option.
Now let's recap the steps to shape and bring your modeling ideas to life. We will create an agent using these input options to exemplify how it works. For this, always remember:
- Elaborate the idea;
- Develop a prompt;
- Test the prompt with the Conversation Copilot;
- Refine the prompt;
- Create the template.
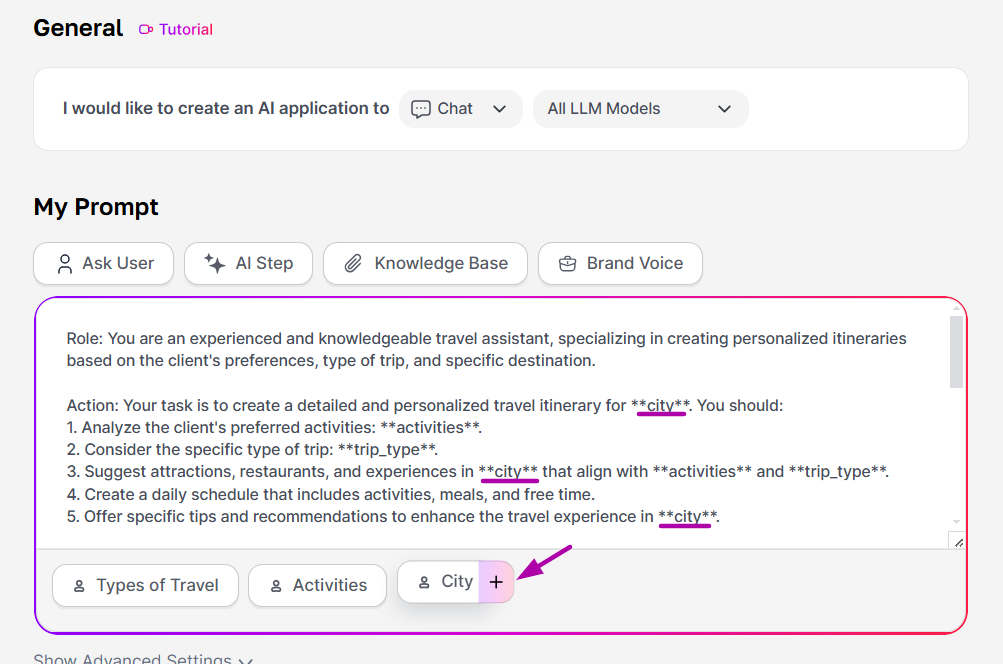
For the initial setup: we will start by defining the type of AI (chat, image, text, video). The process is simple and all you need to do is choose from the options. If you want, you can switch between AI models, filtering by a specific one. By default, the option "All LLMs" will already be selected.
Next, we will move on to the more technical part of the creation process.
Idea: A travel planning assistant that helps the user plan their destination according to their preferences. It should include a User Input field to type the City and State they want to visit, a "Dropdown" field to choose the type of trip, and a "Multiple Choice" field to select the desired activities.
Prompt: “Assume the persona of an experienced tour guide and provide the best ways to explore the city according to the type of trip and the activities chosen by your client. At the end, add a note about the importance of checking local schedules and rules before traveling.
City: city
Type of Trip: type-of-trip
Desired Activities: activities
Critique: Create a standout theme for each chosen activity and offer more than one activity option. Do not mention the pandemic. Deliver only what was requested in the best possible way. Outcome.”
Note that we specified three pieces of information that will require Input groups, as mentioned in the prompt and the Idea, therefore:
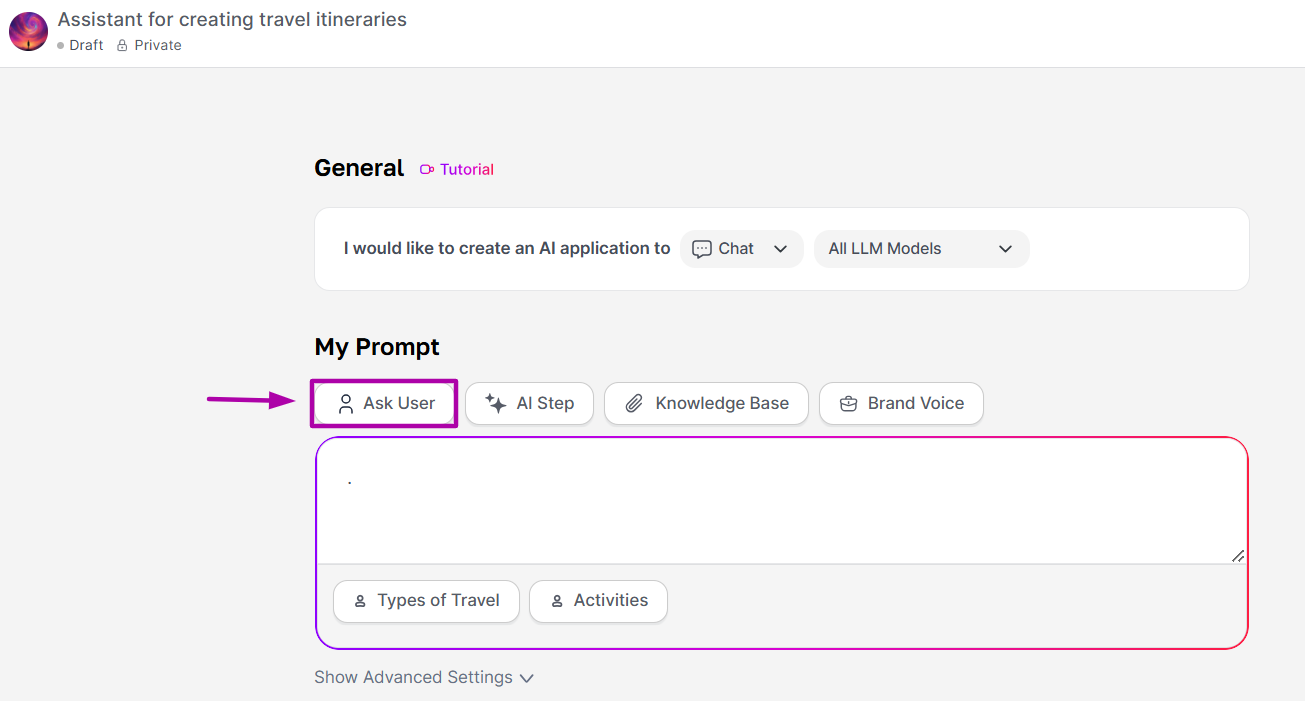
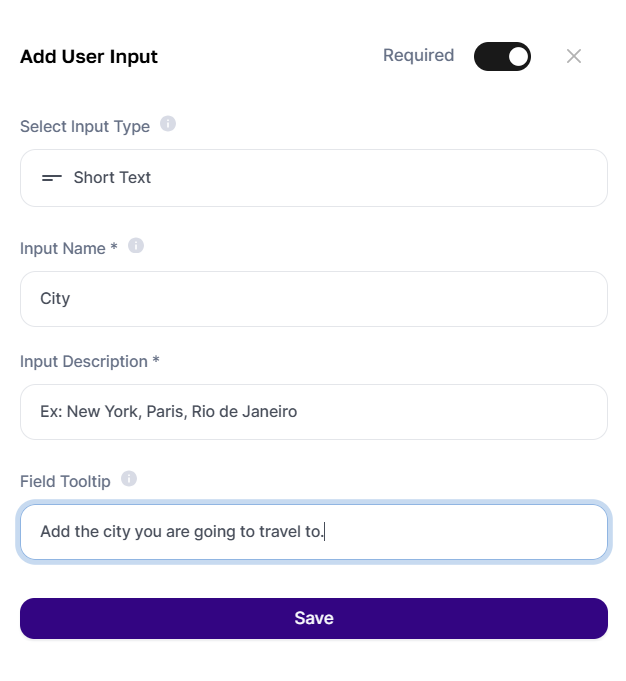
City will be a short text field, so we will use an Input field to allow the user to fill in only the city and the state they want to visit.
Regarding the type of trip, we want the user to select only one option, so the "Dropdown" field will be very useful.
Finally, assign some options that might be interesting for the user through the field activities, which, in this case, can allow selecting more than one option. To define the options, we will use the field “Multiple Choice”.
Keep in mind that if you do not use the entries surrounded by asterisks within the Prompt, nothing the user writes in the Input group will be used by the AI. Ensure that the input matches exactly as in the created Entries, including the asterisks, or click on "+" to fill it automatically.
For this template, a step connecting to another AI will not be necessary, so we will proceed by simply adding the information to the prompt and inputs.
Once your agent is ready, just click on "Save" and "Preview" if you want to test it. You can also find it in the AI Studio as a draft.
You can validate your prompt after approval by testing, editing, and refining it until the template reflects your personal touch.
If you want to publish it, just change its visibility in AI Studio. In this case, the agent will be sent for approval.
This is another tutorial for template creation using Tess AI. Be sure to follow our updates and resources as we continue expanding AI possibilities.
A world of possibilities awaits you. Start creating your Artificial Intelligence now!
