In this tutorial, we’ll dive a bit deeper into User Inputs and show examples by creating an agent.
To start your journey with Tess AI, let’s check out two input types and how they work in an agent. Here they are:
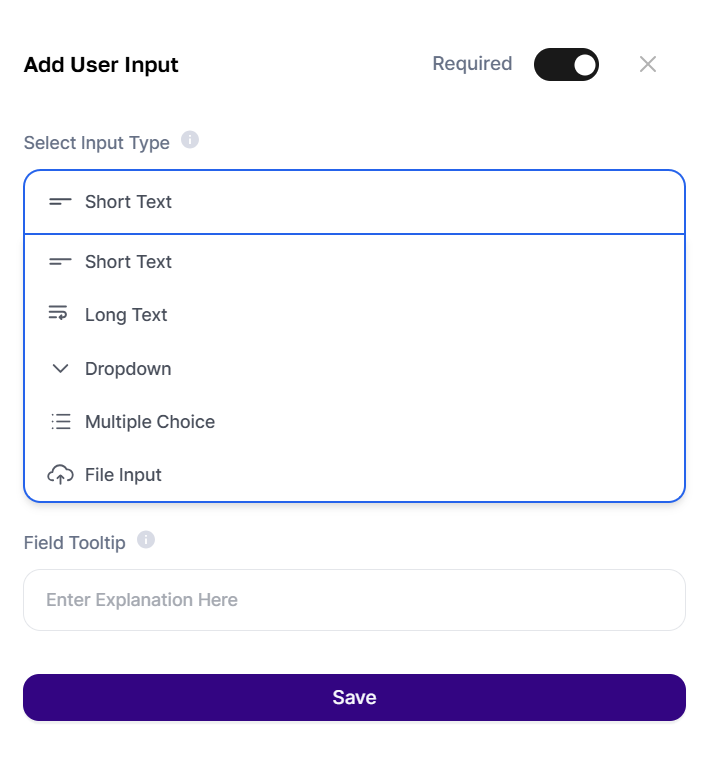
Short Text Field: when you pick this type, users can enter short answers for direct responses.
Long Text Field: this one lets users enter big chunks of text in case your agent needs a lot of info.
Now let’s pick the “Short Text” input, like you see in the image below:
To recap the steps that will help you organize and bring your agent ideas to life, always keep these in mind:
Come up with the idea;
Develop a prompt;
Test the prompt with Text Copilot;
Refine the prompt;
Create the agent.
In this tutorial, we'll continue from Step 5. If you need to review the previous steps, you can follow the walkthrough by clicking here.
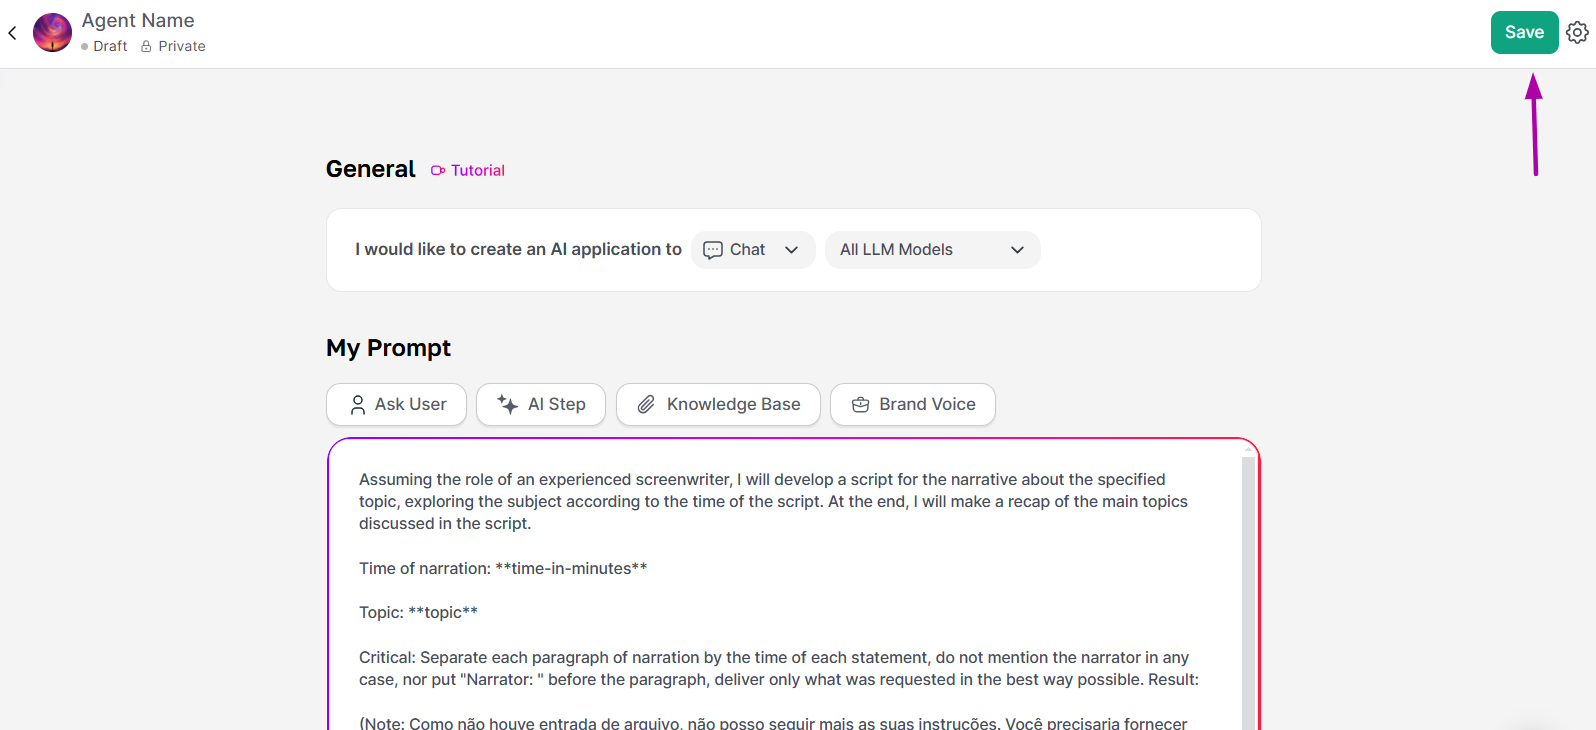
For the initial setup: we'll start by picking the type of AI (chat, image, text). The process is simple and all you have to do is choose from the options. If you want, you can swap between AI models by filtering for a specific one. By default, the “All LLM” option is already selected.
After that, we'll move on to the more technical part of the creation process.
Idea: Developing a script for making a narration. This agent should be able to create a narrative about a central topic.
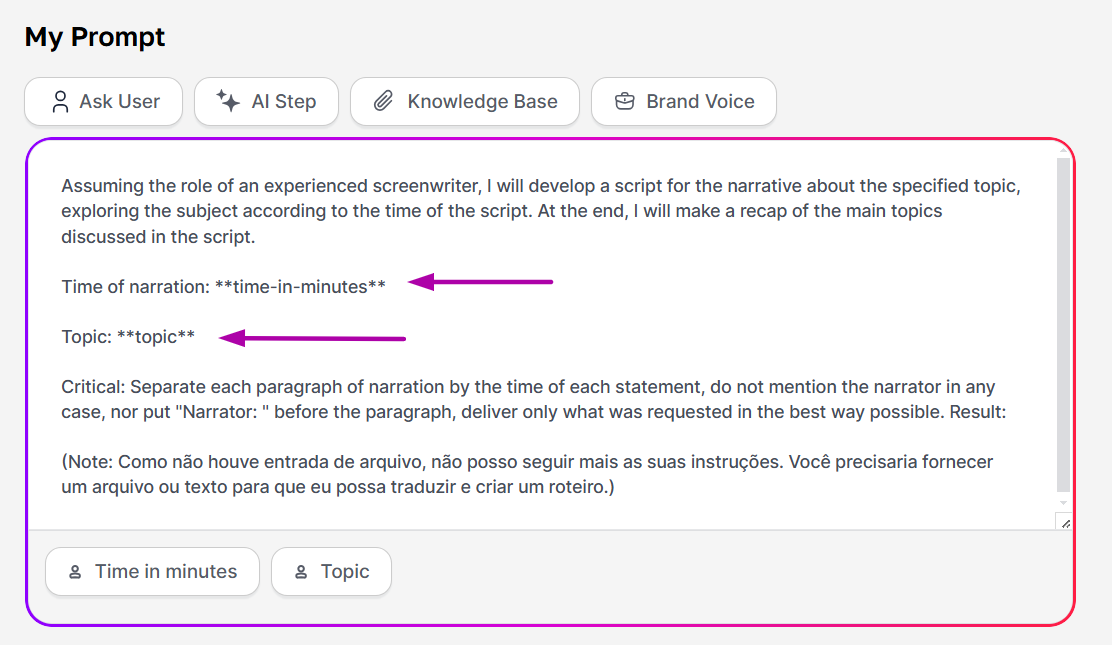
Prompt : “Assume the persona of an experienced scriptwriter and develop a narration script about the specified topic, exploring the subject according to the script's length. At the end, recap the main points covered in the script".
Narration Time: time-in-minutes minutes.
Topic: topic
Critique: Separate each narration paragraph by the time for each segment, don't mention the narrator at all, and don't add “Narrator: ” before any paragraph, just deliver what was requested in the best way possible. Result".
Notice that we’re specifying two pieces of info that will need input groups, the time-in-minutes data and topic.
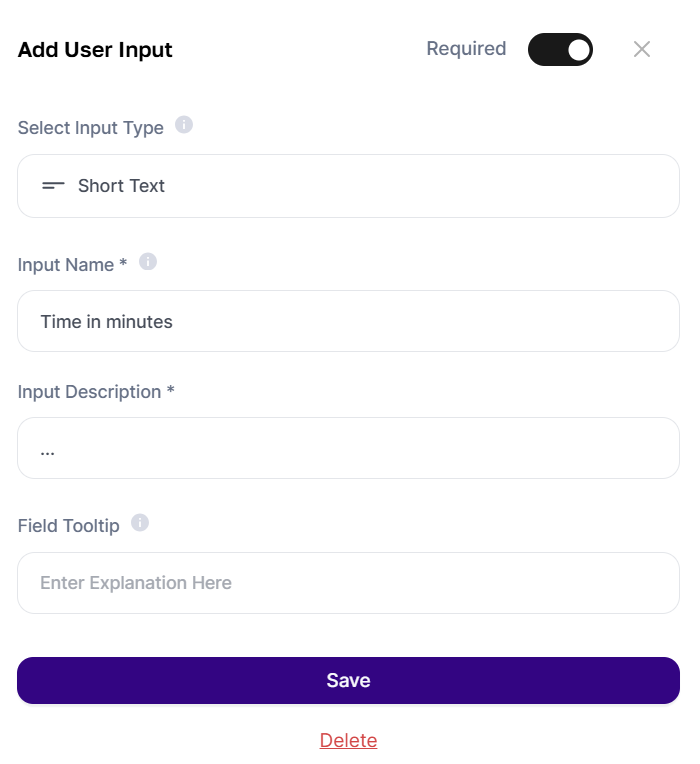
time-in-minutes will be a short text field, so we’re going to use an “Input Field” so people only fill in the number of minutes they want.
For the topic, we want the user to feel free to share details. So, a “Long Text” works better in these cases.

Keep in mind, if you don’t use the entries between asterisks in the Prompt, nothing the user types into the input will be used by the AI. So, make sure to fill it in exactly as in the created inputs, including the asterisks, or click “+” to auto-fill.
For this model, you won’t need to connect to another AI, so we’ll just keep adding the prompt and input info.
When your agent is ready, just click “Save” and “Preview” if you want to test it out. You can also find it in Agent Studio as a draft.
You can validate your prompt after approval by testing, editing, and tweaking it until the model has your personal touch.
If you want to publish it, just change the visibility in Agent Studio. In that case, the agent gets sent for approval.
Here's another tutorial for making models with Tess AI. Make sure to follow our updates and features as we keep expanding what AI can do.
A world of possibilities is waiting for you—start building your AI right now!
