Imagine being able to understand what's said in videos or audios from foreign languages and having your own personal translator, helping you figure out what was said through speech recognition. With the help of Tess AI, that's possible.
In this tutorial, we'll explore one of the User Inputs in detail. This content is considered intermediate, so it's really important that you've at least finished the Text Agents Tutorial. If you haven't done it yet, you can check it out by clicking here.
If you've already read it, we figure you already have the basics about creating agents, so we can go a bit further and dive deeper into this input groups topic.
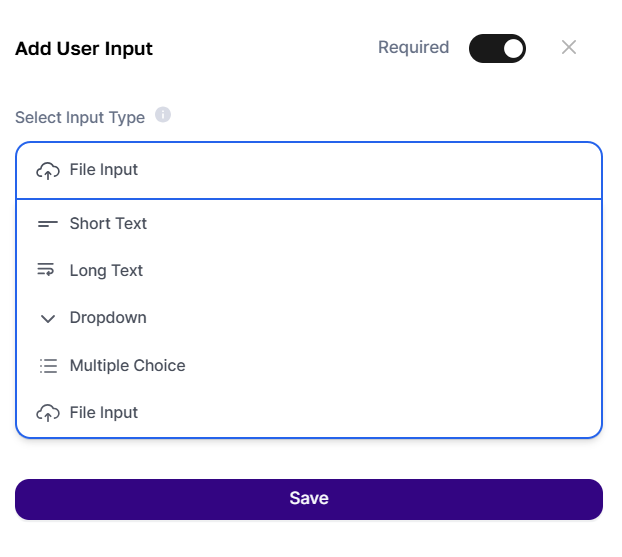
To start your journey with Tess AI, we'll go through each of the options below and how you can use them in the "Upload File" field.
Short Text Field: when you select this type, you let the user type short texts for more objective answers.
Long Text Field: you can let the user enter large blocks of text, if your agent asks for a big amount of info.
Dropdown: lets you create a single selection box, where the user picks one of the options.
Multiple Choice: lets you create a multiple selection box, where the user can select more than one option.
File Upload: this is where you can upload your attachment materials.
Now, we'll select the Upload File field, as shown in the image below:
This field is for situations where you want to send audio or video files, documents, etc.—this is a crucial feature in everyday life! It fits perfectly with an AI Step, like reading documents, for example.
To recap the info that’ll help you organize and bring your agent ideas to life, always keep these steps in mind:
Come up with the idea;
Develop a prompt;
Test the prompt in Conversation Copilot;
Refine the prompt;
Create the agent.
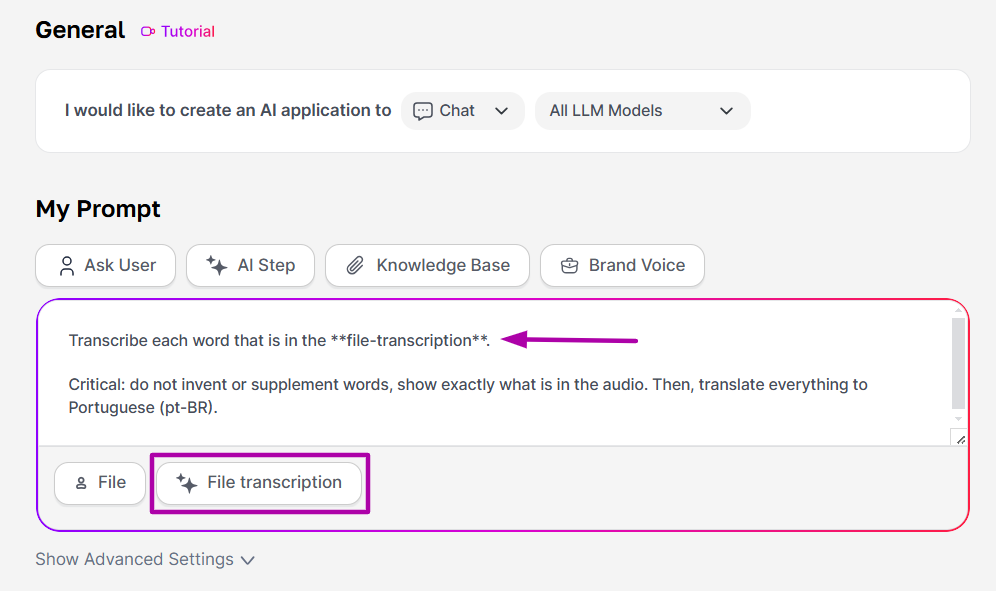
For the initial setup: we’ll start by picking the AI type (chat, image, text). It’s easy — all you need to do is choose between the options. If you want, you can switch between AI models by filtering for a specific one. By default, the “All LLM” option will already be selected.
After that, we’ll move on to the more technical part of the creation process.
Idea: An agent that can analyze an audio or video file in a foreign language and translate it to Portuguese. Just send the file and get all the formatted content.
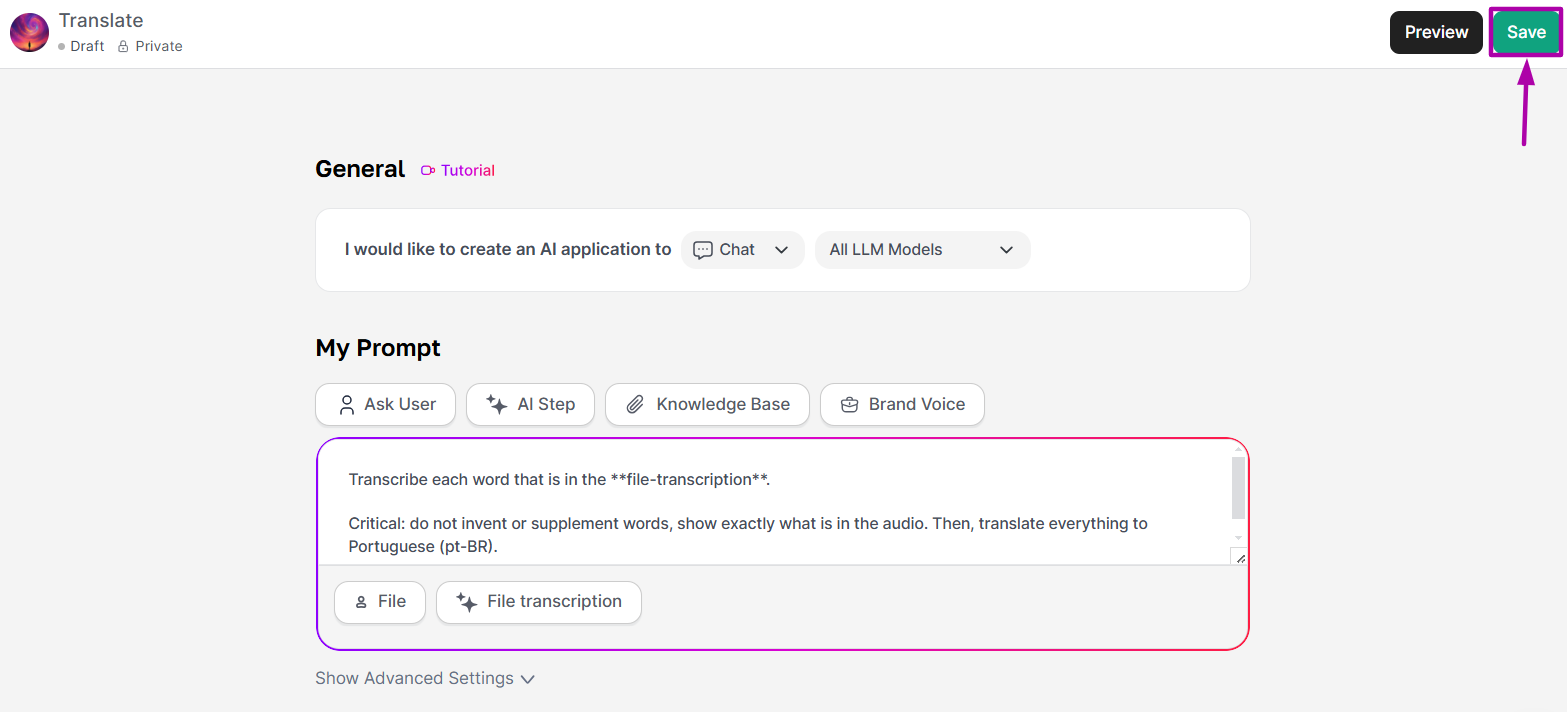
Approved Prompt: “Transcribe every word that’s in the converted-file".
Important: don’t make up or add words, just show exactly what’s in the audio. Then, translate everything into Portuguese [pt-BR]”.
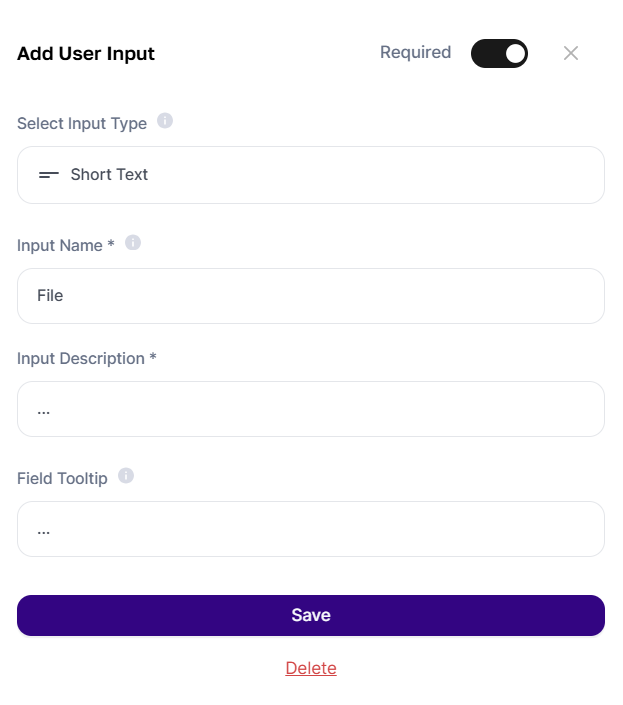
Notice that we specify only one AI Step, which will be linked to the Entry we'll create below. Select the “Upload File” option and fill it out as usual. In this case, the entry field will simply be called “File”.
arquivo-convertido will be the result of analyzing the uploaded file, and it will need the input. As we'll see next.
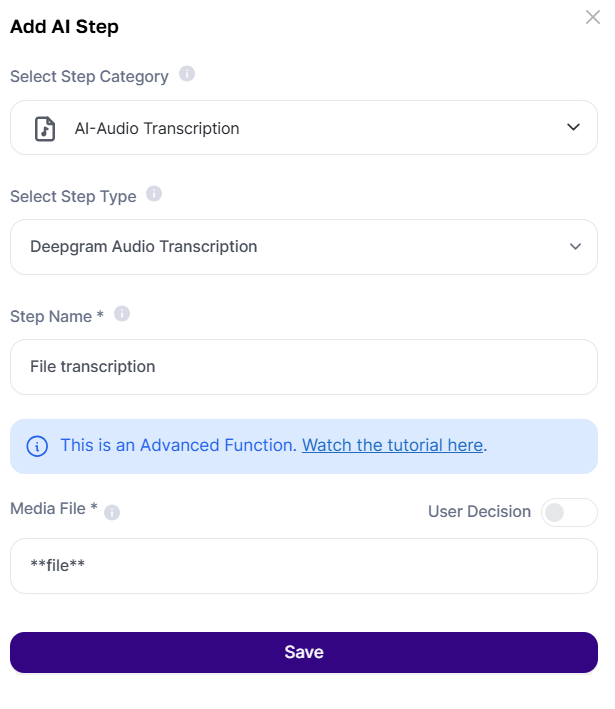
This process is different from other input groups, because it involves adding an Advanced AI Step, so we'll go through the steps so you can follow along.
For this agent, you'll need a step with another AI, an audio transcription AI, so that it can be converted to text.
So, in “Advanced AI Steps”, select the “Audio Transcription” type, and give the transcription a name, in this case, “Converted File”.
Finally, specify that the imported field is “Arquivo” which should have the same name as the input you created. This way, whatever the user enters in the Arquivo input will be transcribed. Make sure the step looks like this:
Keep in mind, if you don’t use the AI Step between asterisks in the Prompt, nothing the user attaches will be used by AI. So make sure it’s filled in exactly as created, including the asterisks, or click “+” to fill it in automatically.
When your agent is ready, just click “Save” and “Preview” if you want to test it. You’ll also find it in Agent Studio as a draft.
You can validate your prompt after approval by testing, editing, and tweaking it until it has your personal touch.
If you want to publish it, just change the visibility in Agent Studio. In this case, the agent will be sent for approval.
Here's another tutorial for creating agents through Tess AI. Be sure to follow our updates and features as we keep expanding what AI can do.
A world of possibilities is waiting for you – start creating your AI right now!
