This feature lets you add data and info to Google Sheets in a smart and adaptive way.
Users can set the sheet URL, data range, and pick whether to overwrite existing data or add a new row/column. You can use AI models to get analytics and insights, and all the results are integrated into Google Sheets, making it easy to sync and update data, so everything runs smoother and you avoid mistakes.
The first thing you need to do is pick your spreadsheet for analyzing and handling data.
As a first step, in the Agent Studio, let's create an advanced step for "App Integration" with the reference sheet URL and data read range. Like in the screenshot, let's call this step Reader and select "Get Values", because we want to get the data.
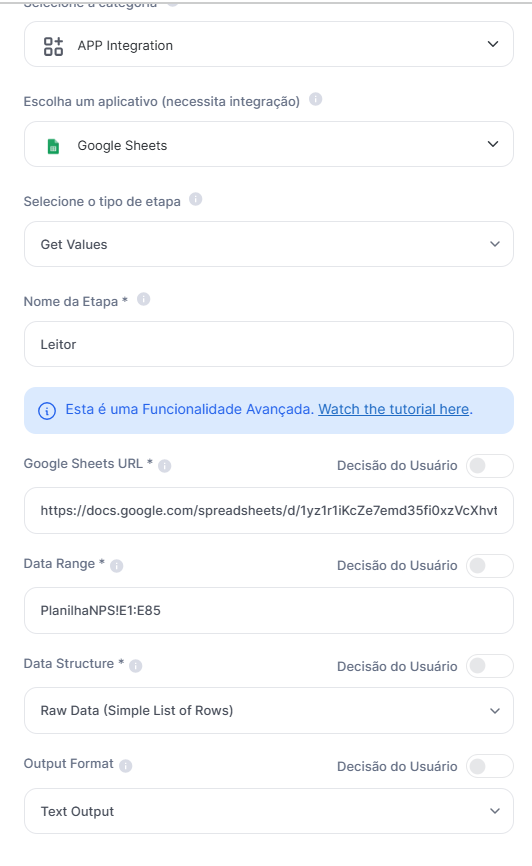
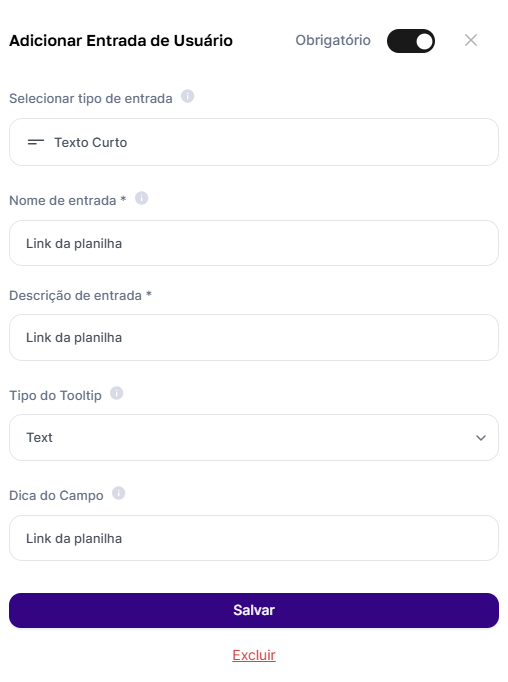
Another option is to not set a fixed URL in the advanced step. To do this, just select the option "User's Choice" and, in this case, it’s recommended to add an input field for data and also a reading radius, like in the screenshot.
Which leads to the selection below

Before changing the spreadsheet, we need to process and analyze what comes from the spreadsheet and the selected data range, meaning we have to use an assistant that will check and recommend the actions you want to take as a user, right?
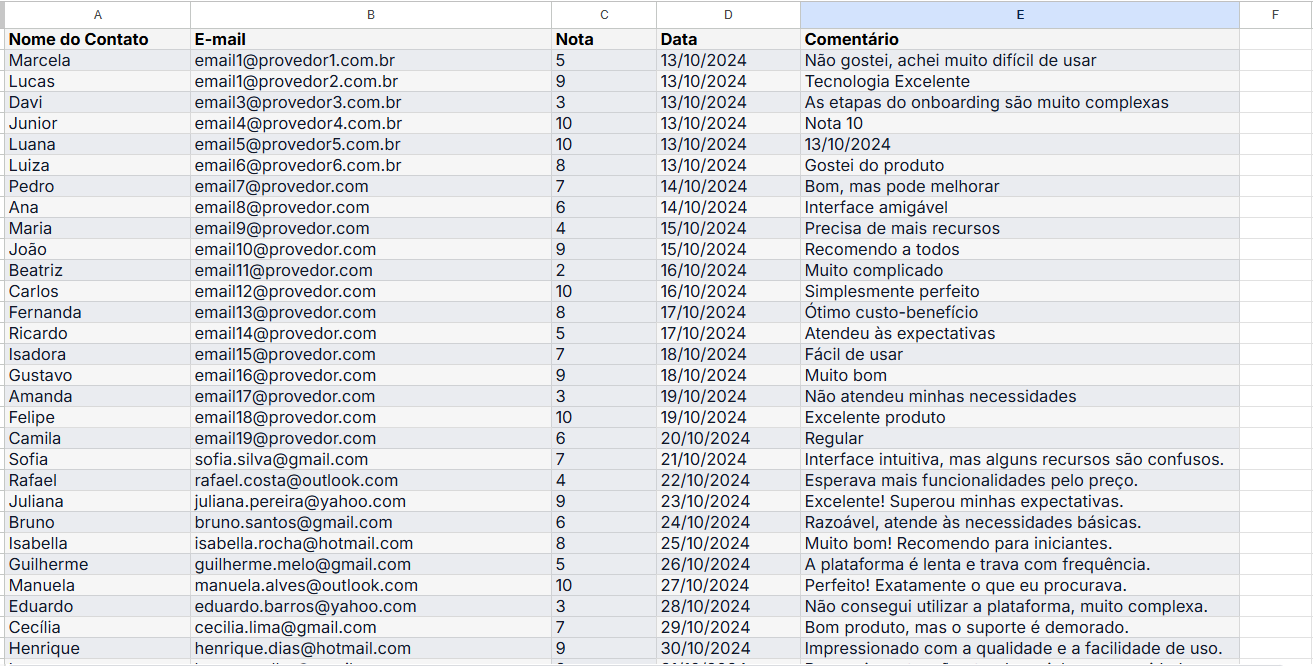
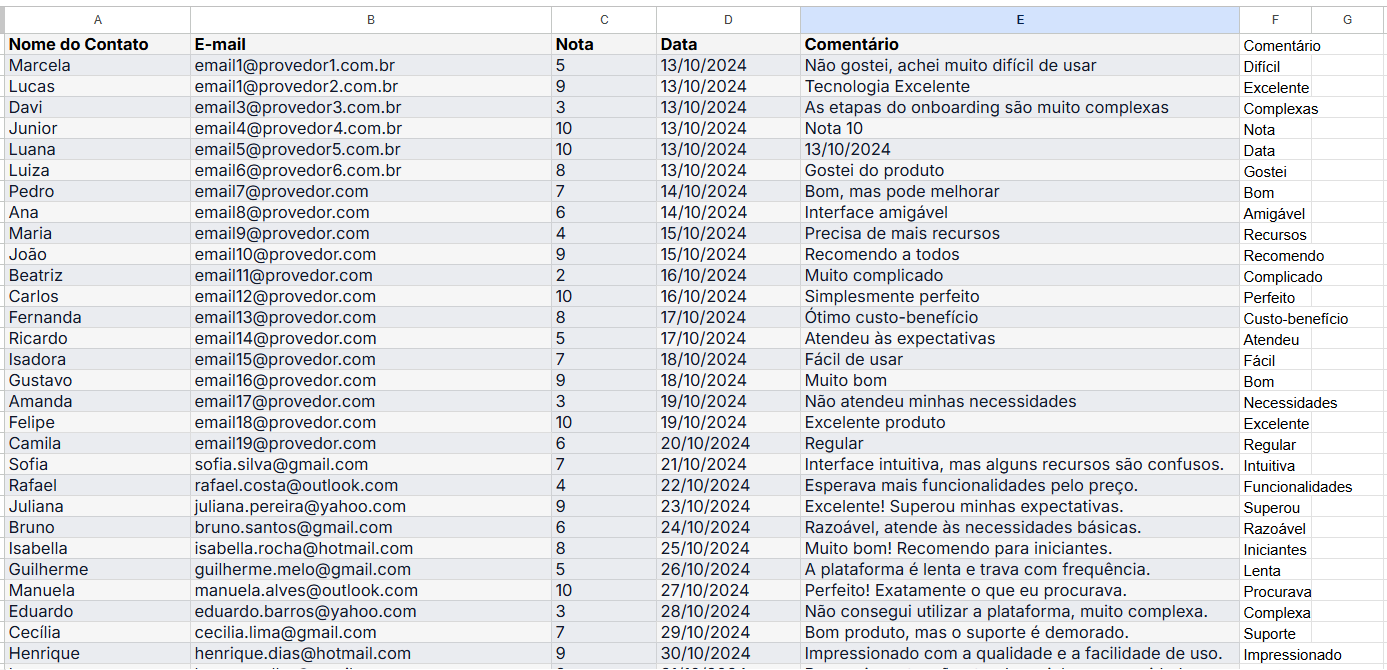
Here's an example of a survey where we want to look at the comments made by clients and sum up those comments in a single word, just like in the example below
Comment | Summary |
Didn't like it, found it really hard to use | Hard |
Awesome Technology | Awesome |
The onboarding steps are way too complex | Complex |
Bringing the example above that we mentioned, let's select the Step AI Assistant and choose the Chat GPT Text Assistant, like in the screenshot below
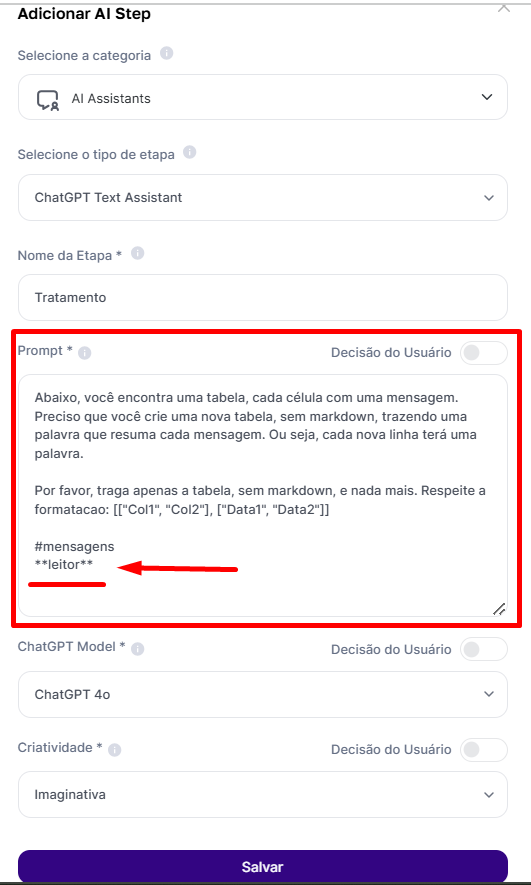
Notice that inside the assistant, we already have a prompt ready with what we want to execute, so I'm already telling the chatgpt assistant what I want it to do.
Below, you'll see a table, each cell with a message. I need you to create a new table, no markdown, bringing one word that sums up each message. So, each new row will have a single word.
Please, only bring the table, no markdown, and nothing else. Stick to the formatting: [["Col1", "Col2"], ["Data1", "Data2"]]
#messages
**reader**
Sure, I need to reference the spreadsheet I added. That's why I have the reference to the **Reader**, the first step I included which has the spreadsheet and its data range, as well as I'll bring exactly the data format I want the spreadsheet to show me.
So, what have we done so far?
We insert the analysis spreadsheet (Creation of the Reader using the Step App Integration and selecting Get Values, to get the values)
We choose the data range for analysis (Creation of the Reader using the Step App Integration)
We decide that we want to process the data (Creation of the Processing Step using the AI Assistant)
We decide how the processing will be done through a prompt that will reference the analysis spreadsheet (Definition of the Processing Step using the AI Assistant)
So far, so good!
So what’s missing?
We’ve already got the reading, the processing... we just need to change the spreadsheet, right?
Now comes the easiest part. We've already read and handled it, now we just need to write.
Let's go ahead and create a new advanced step in "App Integration" with the reference spreadsheet URL and the data reading range. But, unlike field 1, we'll call this step Writer and select "Write Values", since we want to write the data, not get it anymore!
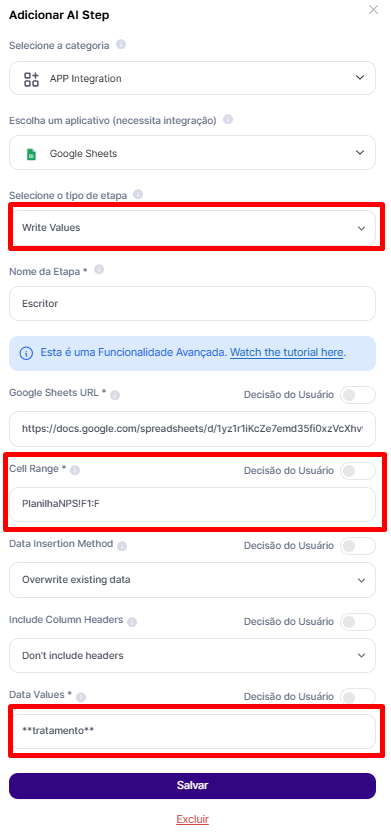
Besides that, I need to make some other selections:
Write range: you need to select which column or space you want to write the processing in. Since I have the data in column "E"—which is what I want to process—I'll write in column "F", right next to it.
Insert method: you can choose to overwrite the data in the selected range (that's how it's set in the screenshot above), or make new lines so nothing gets overwritten.

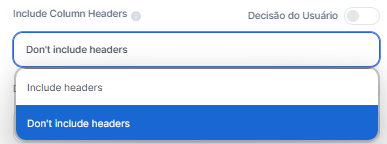
Include headers or not: also, you can choose to include headers or leave them out.
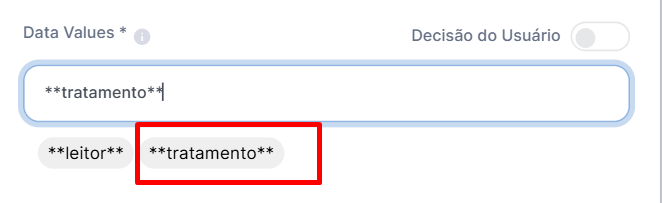
Values to be inserted: as the last step, I need to select what will be put in column F (which was my selection). Of course, I want the processed data to be that. And since I already have this “Step” ready, because it’s exactly what I processed, I just need to reference it.
Keep in mind that everything can also be a user’s choice, ok? In this case, since we’re doing it based on the spreadsheet, we left it all ready, but feel free to create however you like!
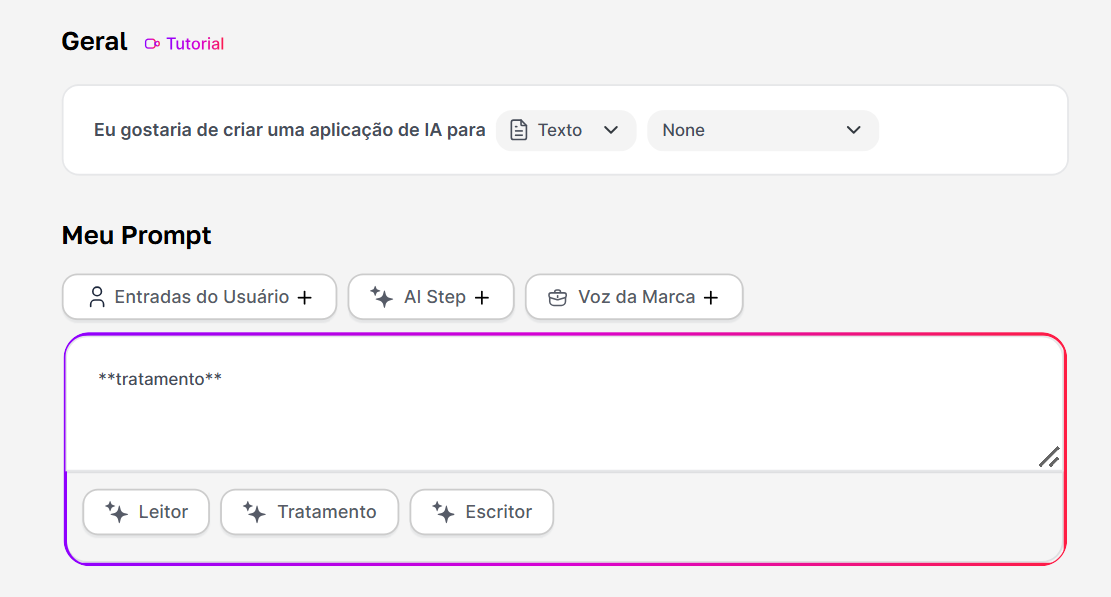
To finish the Agent, I just need to wrap up with any prompt I want. In this case, since I already have everything I want, I'm just leaving it as a text Agent with no need for AI, just bringing me back the comments summarized in one word.
After all, everything is already set up in the AI Steps
In short, here’s the result after asking it to generate.
Before
Using the template
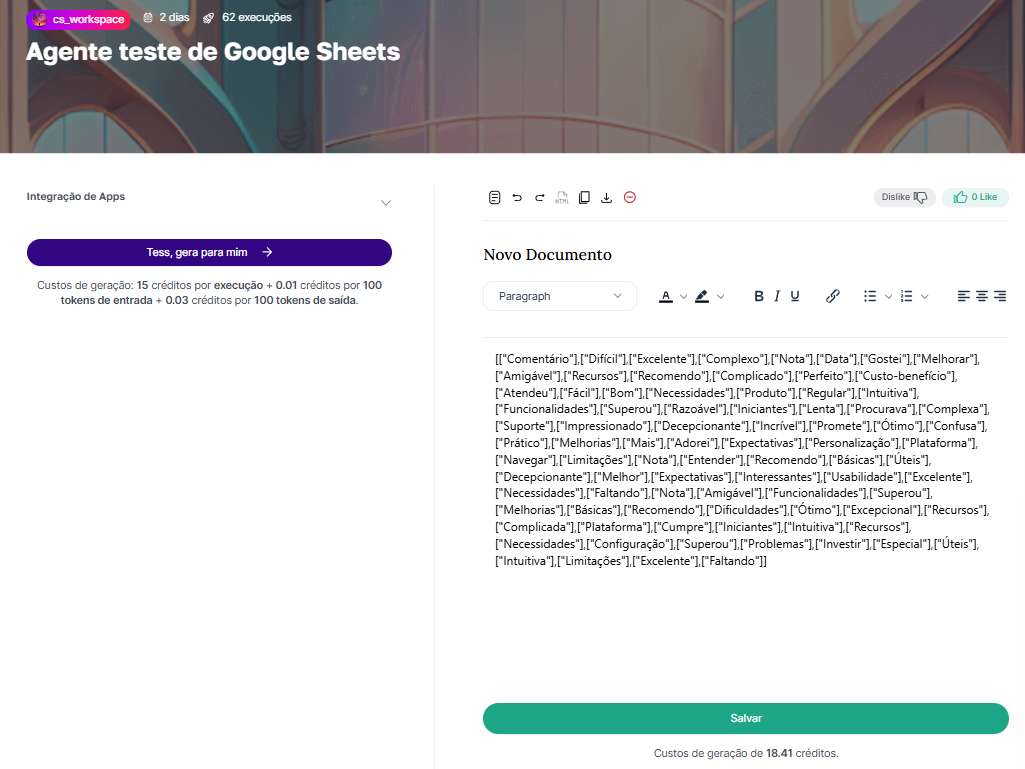
After using
Congrats! You’ve learned how to use the function to add data smartly and efficiently to your Google Sheets. With this tool, you can:
Automate data updates: Say goodbye to manual data entry, save time and avoid mistakes.
Integrate analytics and insights: Use AI-powered models to get valuable information and plug it right into your spreadsheets.
