The ability to interact with your own documents is one of Tess AI's most powerful features, letting the AI understand and use info that's specific to your context. The platform's AI chat lets you add files to your knowledge base, turning them into rich sources for more accurate and personalized answers.
This article explains how you can add, set up, and make the most of documents inside Chat, exploring the different supported file types and processing modes that guarantee the best performance for every situation.
Tess AI's Chat brings together different AI models in a single interface. To get started with documents, the first step is to open this tool.
Step by Step to Add Documents:
On the Tess AI panel, open a new chat or go to a chat from your history.
Find the "Add Photos and Files" button, shown by a + icon, next to the chat's text box.
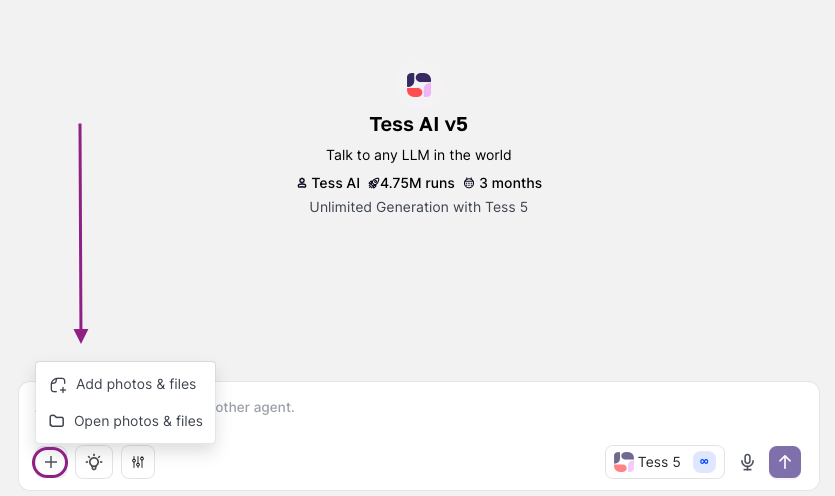
When you click on this button, a window will pop up letting you choose the type of document you want to add.
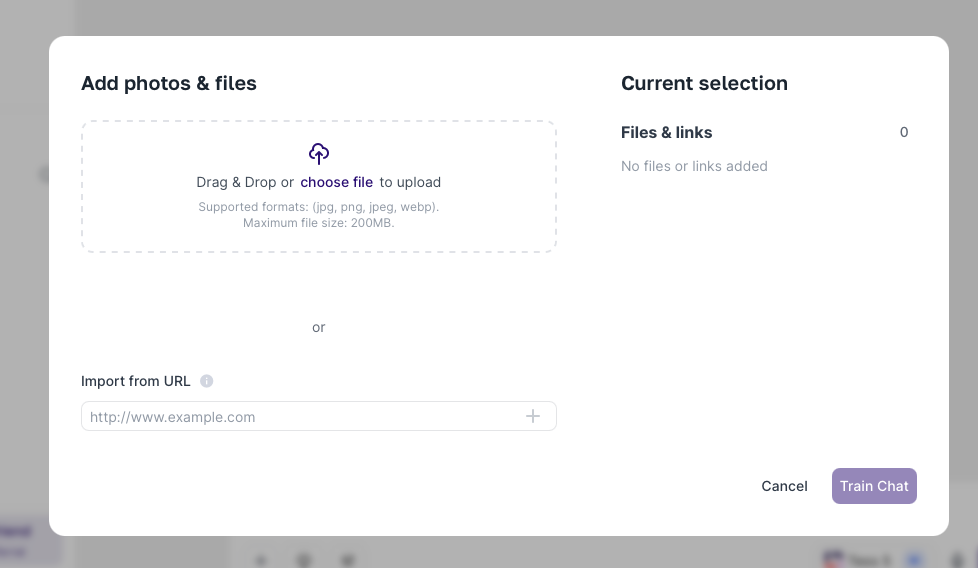
Tess AI supports a huge range of file formats, including for example:
Audio (e.g.: MP3, WAV)
CSV (Comma Separated Values)
Code (multiple languages)
DOCX (Microsoft Word)
Excel (XLSX)
Google Sheets (via URL)
Image (e.g.: JPG, PNG)
PDF (Portable Document Format)
TXT (Plain Text)
Web Scraper (Extracting content from URLs)
When you add a document, Tess AI uses specialized tools to extract the text inside it. For example, for audio files a transcription tool is used; for PDFs and DOCX, text extraction tools are applied.
This initial extraction process might use a small number of credits, even if you have unlimited AI models, because the extraction itself isn’t an AI feature but a prep step. Once the text is extracted, it’s stored and is ready for the AI to look up without any extra cost per query.
Plus, the processing cost for the same files gets charged only the first time. That means if you need to add a file that’s already been uploaded and processed on Tess in another chat, it won’t use up your credits.
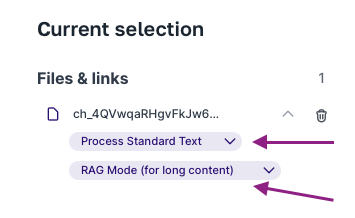
Each file type has individual settings that show up after you select it. For example:
Excel (XLSX): You’ll need to pick the file to upload and the “Range”, meaning the tab and cell range the AI should read (ex: “Sheet1!A1:Z100”). You can’t read all tabs at once.
Audio: Besides the file, you can choose the transcription AI you want (ex: Deepgram, OpenAI Audio, AssemblyAI) and pick the audio language.
Google Sheets: You add it by using the spreadsheet URL, which needs to be set to public access or access for the Tess AI user.
Most settings have an information icon (“i”) next to them that gives you a short explanation about what it does.
One of the most important settings in Tess AI when dealing with documents is the “Context Mode”. This option, which usually isn’t available in other AI platforms, lets you define how the AI is going to process and interact with your document’s content. Before we go into the different modes, it’s key to understand the idea of a “Context Window”.
Understanding the Context Window: Every AI has a "context window", which is the maximum amount of information (measured in "tokens" – small pieces of text, not necessarily full words or individual characters) it can process and "remember" at once during a conversation or analysis. If the amount of information goes over this window, the AI might start "forgetting" the oldest parts. Newer AI models tend to have bigger context windows. Tess shows this info for every available model.

There are two main context modes in Tess AI:
Deep Learning Mode (Short Content):
How it works: This mode takes all the document text and puts it right in the AI's context window for each query. It’s like you copy and paste the whole document content into the chat every time you ask a question.
Pros: The AI has access to all of the document for every answer, which can be great for a holistic understanding of smaller texts.
Cons:
If the document is too long, it might go past the AI’s context window, so only part of it gets analyzed.
For long documents, even if they fit in the window, the AI might get “lost” or have trouble keeping focused on your specific prompt.
The AI rereads the entire document on every interaction, which can be less efficient.
When to use: Perfect for short documents (like, up to 3-5 pages, depending on text density and the AI’s chosen context window). Awesome for memos, short articles, or specific spreadsheet sections.
RAG Mode (Retrieval Augmented Generation) (Long Content):
How it works: RAG is an advanced technique. First, the document gets processed once—its text is split into smaller chunks and “vectorized” (turned into numeric representations that capture the meaning). These vectors are saved in a special database that acts like a smart index. When you ask a question, the AI looks up the most relevant bits (vectors) for your query in this index and only uses those chunks to come up with an answer.
Pros:
Super efficient for big documents (manuals, books, large knowledge bases).
The AI focuses only on the relevant parts, so answers for specific questions are faster and more accurate.
Lower chance of going over the AI context window, since only relevant chunks get loaded.
Cons: The answer quality depends on the AI’s ability to find the right chunks. How your doc is structured can impact that. If crucial info is too far away (semantically or physically) from where the AI is looking, it might miss it.
When to use: The best choice for big documents, like technical manuals, company knowledge bases, books, long reports.
Practical Tip about RAG and Document Structure: The effectiveness of RAG mode can be improved by the way your document is organized. For example, in a vaccination manual, if the title "Pregnant Women" is too far from the list of applicable vaccines, the AI might have trouble matching a specific vaccine (like "Flu Vaccine") to the audience "Pregnant Women." In these cases, it can help to adjust the document so that key information (like the target audience) is closer to the detailed info (like the name of the vaccine and its details).
Let's show an example by analyzing a book in PDF, like "Dom Casmurro," using RAG mode, which is perfect for long documents.
Add the PDF:
Click on "Add to Knowledge Base."
Add the "PDF."
Choose the "Extraction Mode": "Standard Text Processing" (if the PDF is text only) or "Image and Text Processing" (if it has images with important text).
Select the "Context Mode": RAG Mode (Long Content).
Select the AI Model:
You can pick a specific model (like Claude, Gemini, ChatGPT) or use "Tess 5", which automatically chooses a suitable unlimited model, or "Tess 5 Pro", which can select from all models, including those that spend credits, for more complex tasks. For an initial analysis of a well-known book, "Tess 5" (unlimited) is usually enough.
Asking Specific Questions:
To make sure the AI uses your document, be explicit in your prompt: "Based on the PDF 'Dom Casmurro.pdf' in your knowledge base, what are the book's publication details, like publisher, volume, and release year?"
The AI, using RAG mode, will search the document's index for the excerpts that have info about "publication," "publisher," "volume," and "year" and provide the answer.
Requesting Summaries of Specific Parts:
"Based on the PDF 'Dom Casmurro.pdf', generate a summary of chapter 5."
The AI will find the part for chapter 5 and summarize it.
Be Specific in Prompts: When interacting with documents, especially if there are several in your knowledge base, mention the file name in your request (e.g.: "In the document 'RelatorioAnual.pdf', what was...").
Consider Document Structure (for RAG): Clear headings, related info kept close together, and good text organization help RAG mode find the most relevant bits.
Try Different AI Models: If you don’t get a satisfying answer, try switching to a different AI model. Some are better at text analysis, others at data. "Tess 5 Pro" can help you pick a more robust model if needed.
Start With Unlimited Models: For most daily stuff, "Tess 5" (which uses unlimited models) is a great pick. If you need more power or precision for something specific, you can switch to a more advanced model just for that interaction.
Limit for Deep Learning: As a general tip, try to use Deep Learning mode for documents up to about 10-20 pages. For bigger stuff, RAG is usually the way to go.
Check the Knowledge Base: You can view and manage all added documents by clicking the option to see the knowledge base. [IMAGE HERE - Screen showing the list of documents in the Knowledge Base]
The same document processing principles (Deep Learning and RAG) apply when you use documents to train or provide context for AI Agents in AI Studio. For example, when you add documents to an agent's knowledge base, it usually leverages a logic similar to RAG. If you use an "Extract Document Content" step inside an agent's flow, the behavior is more like Deep Learning, injecting the content into the context window of that specific step. This is a deep topic that can be explored further.
The feature of adding documents to the AI Copilot knowledge base in Tess AI changes the way you interact with artificial intelligence. By understanding the supported file types, the web scraper nuances, and—most importantly—the difference and uses for Deep Learning and RAG context modes, you can extract valuable info, get more accurate and personalized answers, and really tap into the knowledge within your own files. Try it out, tweak your settings, and see the unlimited potential of having an AI that gets your world.
