User Inputs are an essential feature in Agent Studio to create more interactive and customizable AI agents. Instead of relying on a single text instruction, you can build forms and structured fields to collect exactly the information your agent needs to perform a task.
In this guide, we’re going to explore the five types of user input available on the Tess AI platform, showing how and when to use each of them to power up your creations.
How to Set Up a User Input
Before we dive into the input types, the process to add them is always the same and happens in your agent’s configuration panel:
In Agent Studio, there’s a “User Input” option.
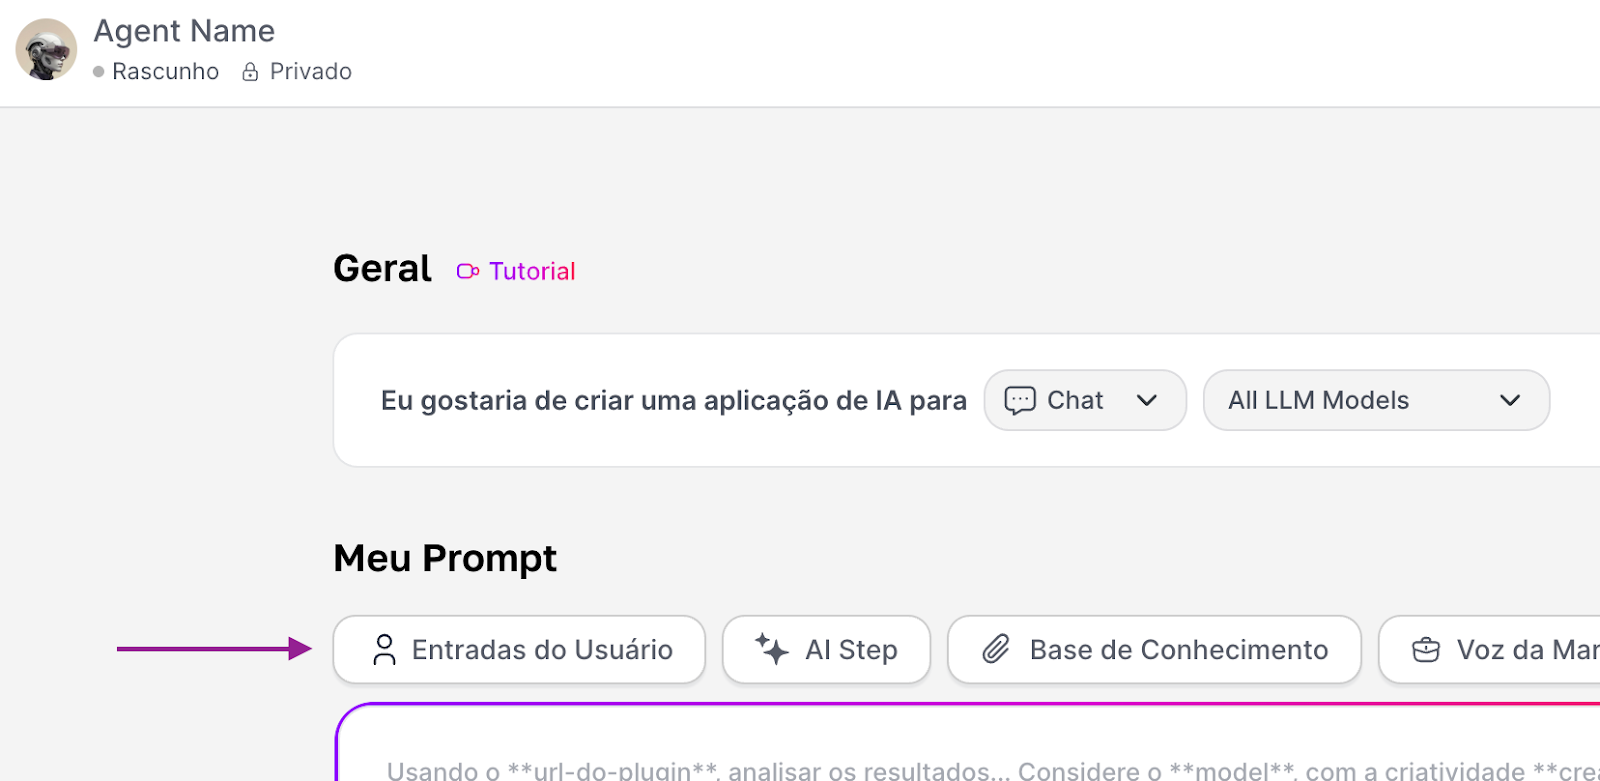
Click it to create a new input field.
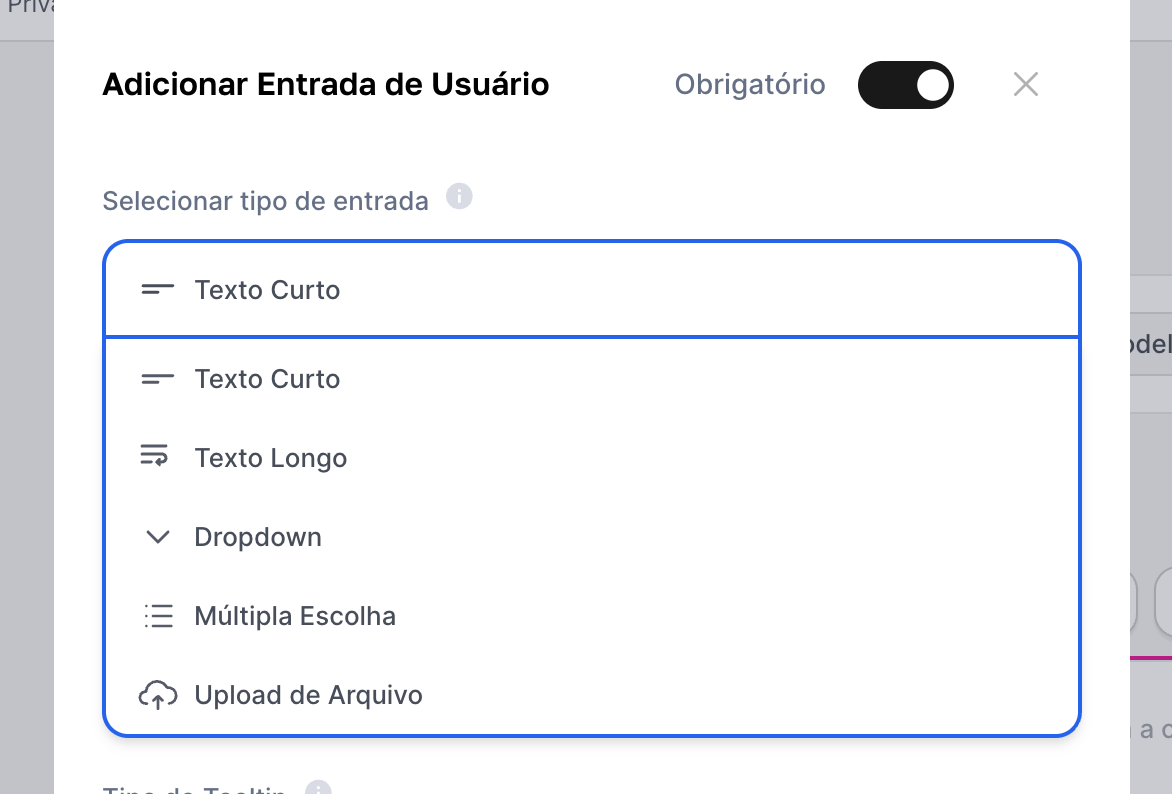
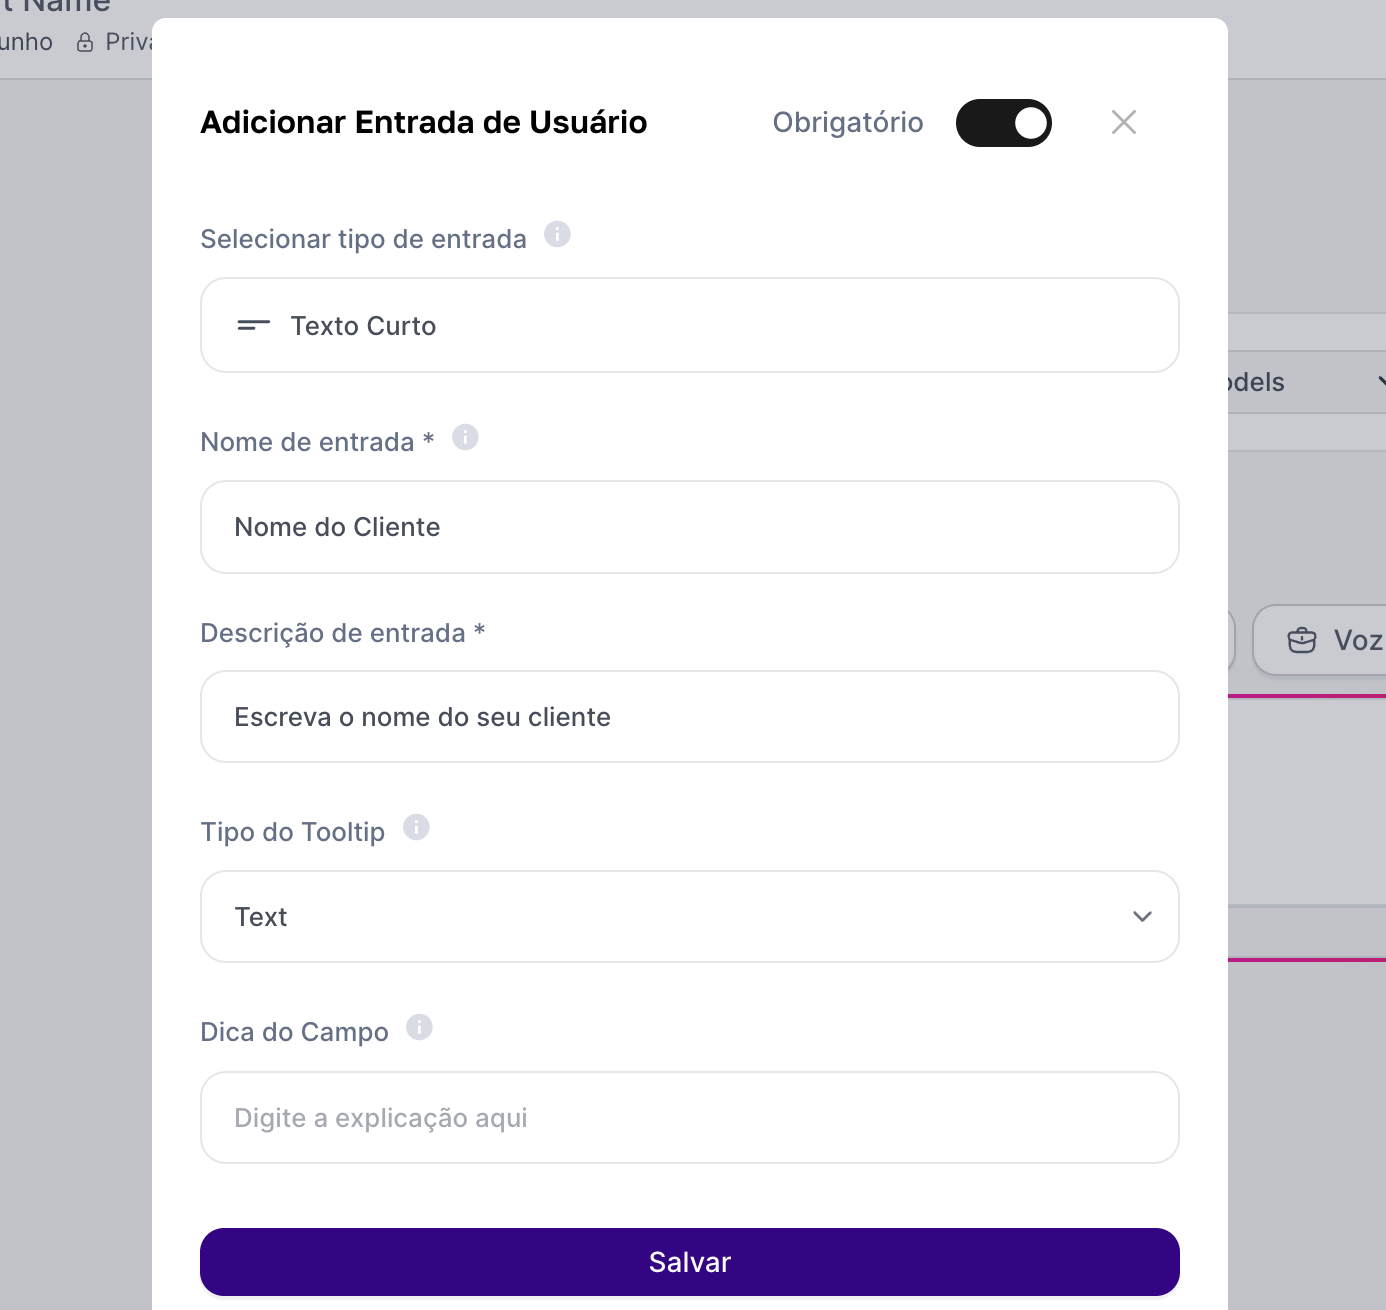
For each variable, you will set up (at least) three main fields:
TYPE: The format of the input that the user will fill in (text, list, file, etc.).
NAME: The internal name of the variable, which will be used in the instruction (prompt). Use short names, without accents and special characters.
DESCRIPTION: The text that will be shown to the end user, guiding how to fill it in.
Exploring the Input Types
Now, let’s break down each of the input types you can set up.
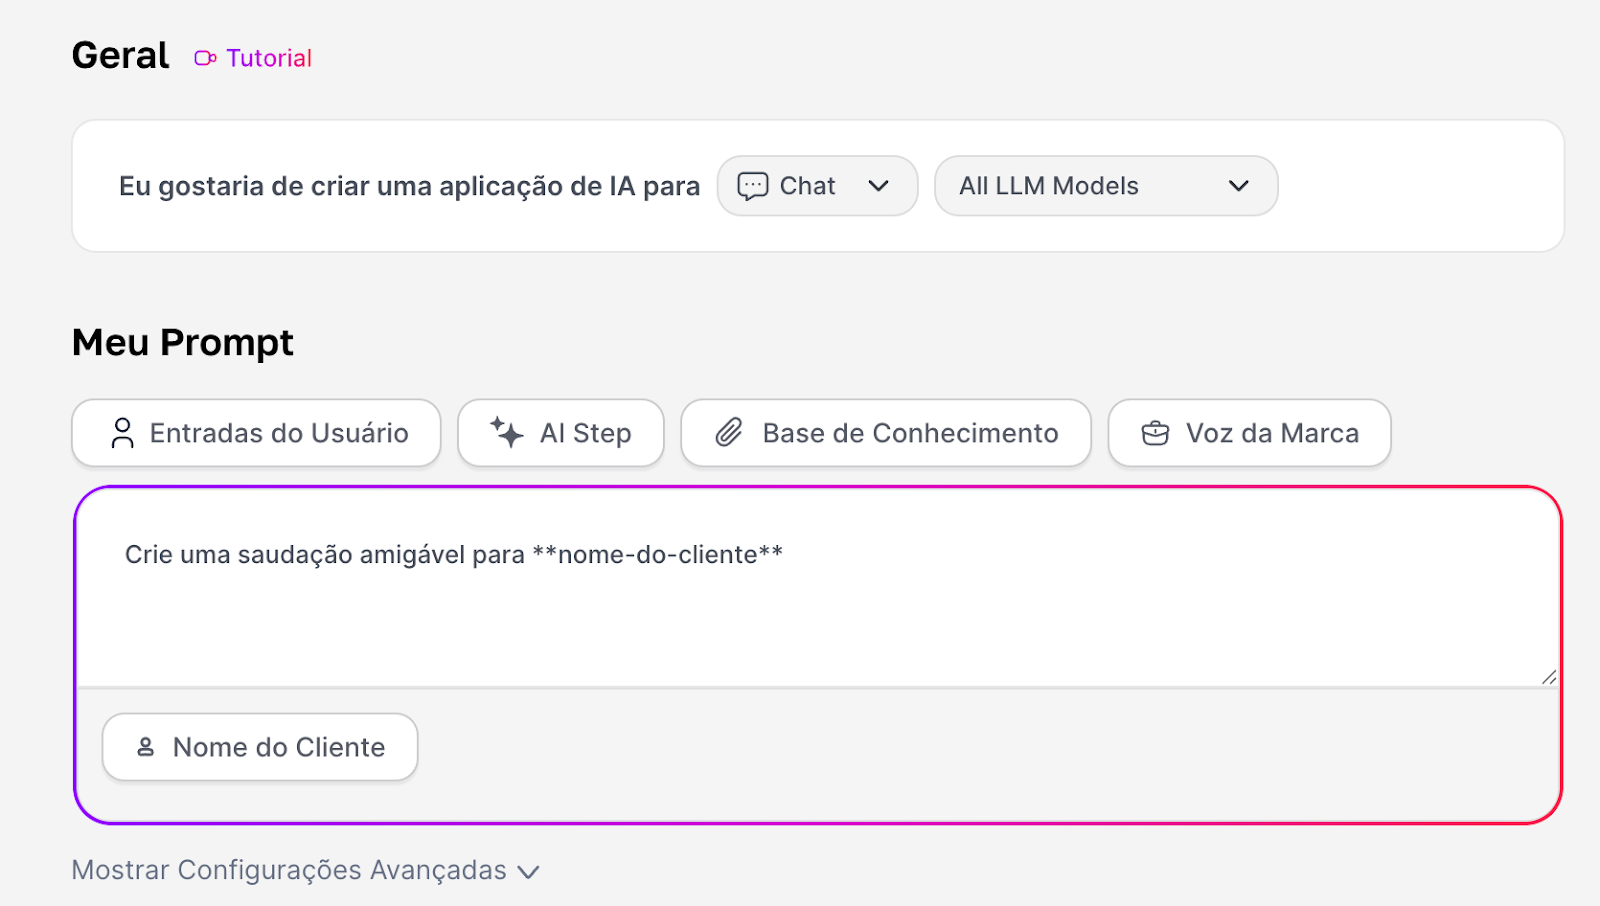
1. Short Text Field
Perfect for collecting brief and direct information. Use this field when the user needs to fill in a word, a sentence, or a specific piece of data.
What it’s for: Collect names, emails, order numbers, search terms, document titles, etc.
Example of use: You can create an agent that generates personalized greetings. The variable Customer Name (Short Text) would ask for the customer’s name:
And the instruction would be: "Create a friendly greeting for **nome-do-cliente**"
2. Long Text Field
Perfect for situations where the user needs to provide a large amount of information, like a full text, a detailed paragraph, or a block of code.
What it’s for: Letting the user paste an email to be summarized, an article to be analyzed, a problem description to be diagnosed, or code to be debugged.
Usage example: A text reviewing agent. The Full Text (Long Text) variable would ask the user to paste the text.
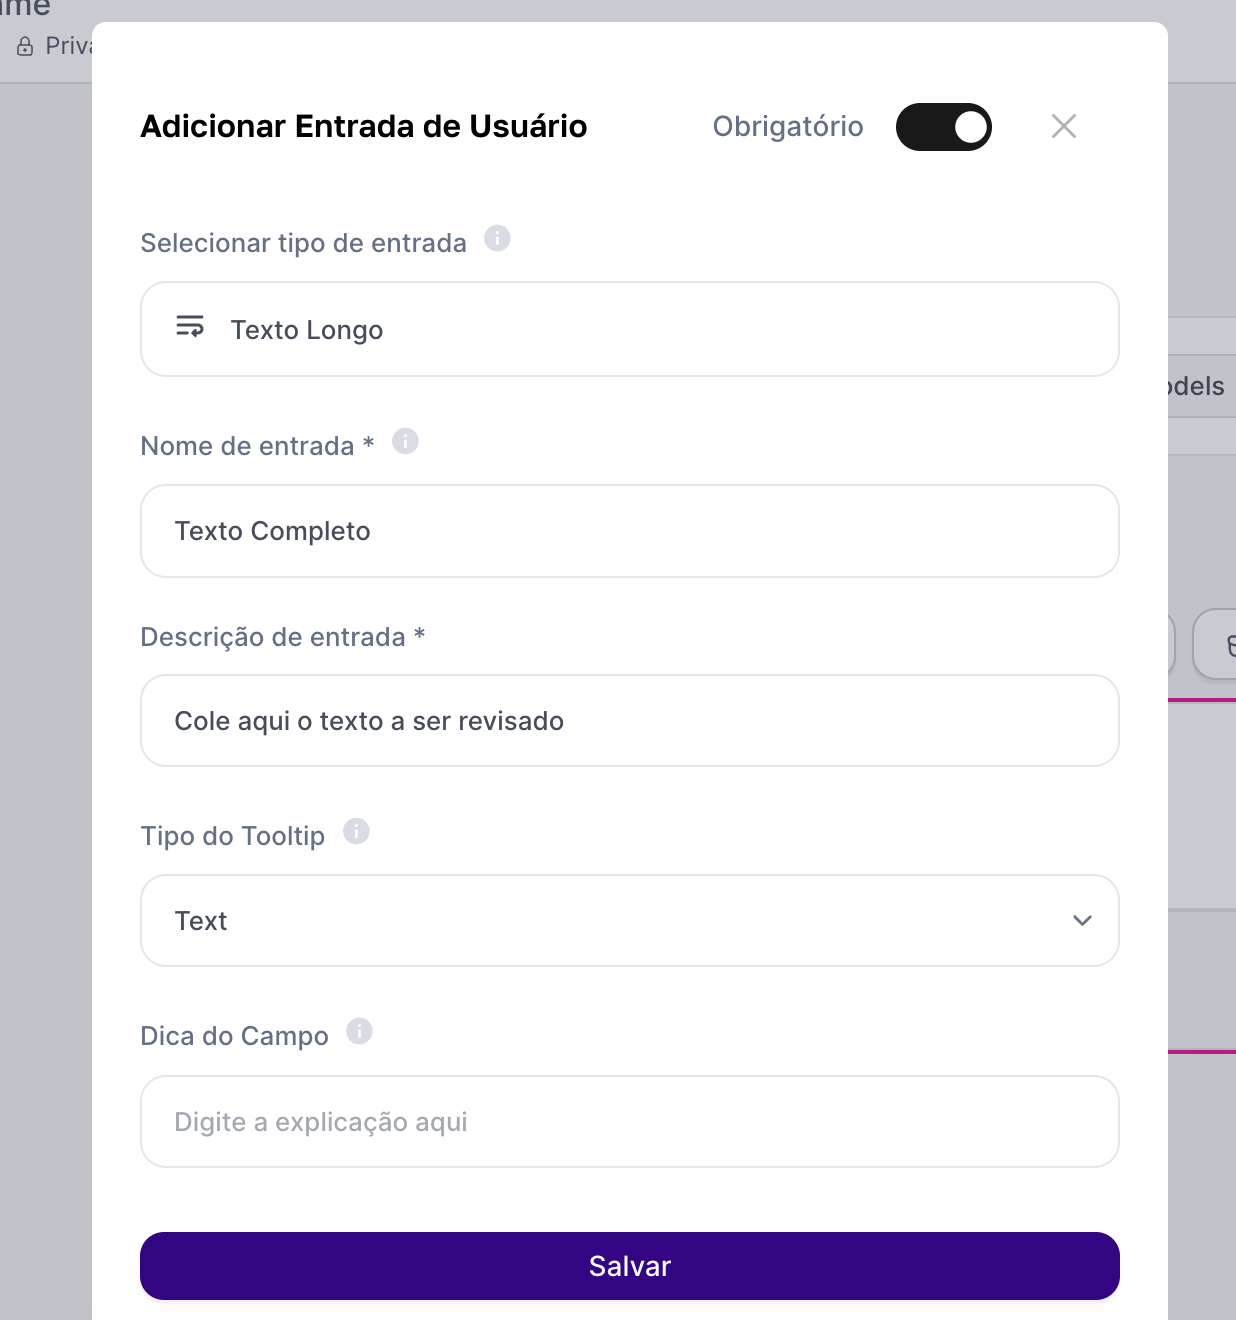
And the instruction would be: "Review the following text and fix the grammatical errors: **texto-completo**"
3. Dropdown (Single Selection)
Use the dropdown to make sure the user's answer is standardized. It shows a list of predefined options from which the user can choose only one.
What it’s for: Limiting the choice to a set of options, like selecting a language (Portuguese, English), a department (Sales, Support), a tone of voice (Formal, Informal), or a specific action (Translate, Summarize).
Example of use: A translator agent. The variable idioma_alvo ropdown) would offer options like "English", "Spanish" and "French". The instruction would be: "Translate the following text into the language **idioma_alvo**."
4. Multiple Choice
Similar to the dropdown, but with the flexibility of letting the user select several options from a predefined list.
What it’s for: When the user can choose more than one valid alternative, like selecting topics of interest for a report, the social networks where a post will be published, or the features of a product to include in a description.
Example of use: A campaign creation agent. The variable redes_sociais (Multiple Choice) would list "Facebook", "Instagram" and "LinkedIn". The instruction would be: "Create a post about AI for the following networks: **redes_sociais**."
5. File Upload
This input type turns your agent into a powerful document analyst, allowing the user to attach files for processing.
What it’s for: Analyzing PDF contracts, extracting data from XLSX or CSV spreadsheets, summarizing DOCX reports, or interpreting the content of any text file.
Usage example: An agent that analyzes spreadsheets. The variable planilha_vendas (File) would ask for the file upload, and the instruction would be: "Based on the spreadsheet **planilha_vendas**, calculate the total sales for the last quarter."
