We know that User Inputs are used to create flexible agents. But instead of open text fields, you can show the user a list of predefined options, making sure the answers are always within what you expect.
In this tutorial, we’re going to explore how to use Single and Multiple Selection fields to build a smart travel planning agent.
Understanding the Selection Input Types
Single Selection Box (Dropdown): Ideal for when you need the user to choose just one option from a list. This makes sure the answer is single and decisive (e.g.: "What’s your budget? High, Medium or Low").
Multiple Choice Box (Checkboxes): Perfect for when the user can select several options from a list. It offers more flexibility, allowing multiple preferences (e.g.: "What are your interests? Food, Culture, Sports").
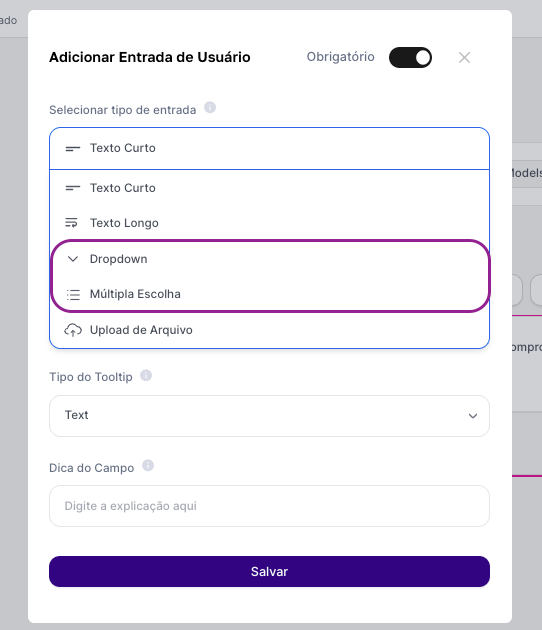
For both types, the list options are created the same way: just type them into the configuration field, separated by commas.
Our Example Project: The Trip Planning Agent
We’re going to build an agent that works like a tour guide, creating a travel itinerary based on the user’s preferences.
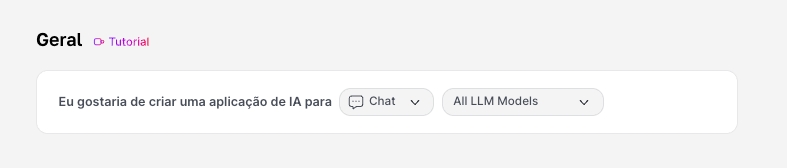
1. Initial Agent Setup
In AI Studio, start creating a new agent. Since our agent will generate a written itinerary, a Chat or Text Agent is ideal. Keep the default selection of "All LLM" or choose a specific model you prefer.
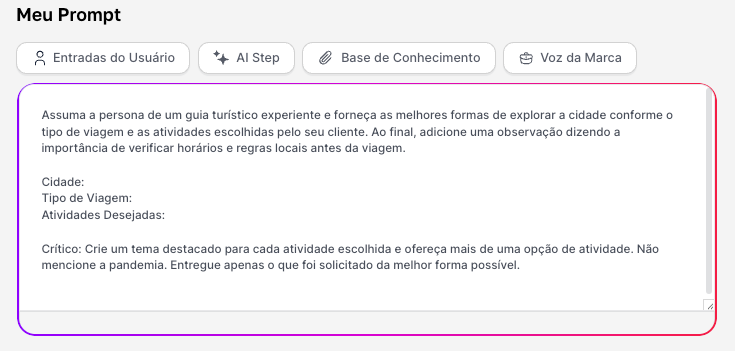
2. Developing the Prompt
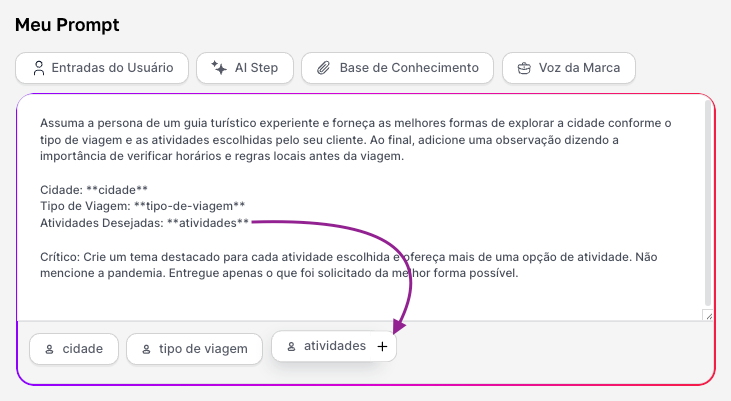
In the prompt field, we’ll insert the logic of our tour guide, the context, and the base guidelines that will guide it:
Assume the persona of an experienced tour guide and provide the best ways to explore the city according to the type of trip and the activities chosen by your client. At the end, add a note mentioning the importance of checking local schedules and rules before the trip.
City:
Type of Trip:
Desired Activities:Critical: Create a highlighted theme for each chosen activity and offer more than one activity option. Don’t mention the pandemic. Deliver only what was requested in the best possible way.
The variables for city, trip type, and activities will be the connection points with our User Inputs.
3. Setting up the User Inputs
Now, let’s create the interface that our end user will fill out.
Input for City: "Short Text", with the name city and label "Which City and State do you want to visit?"
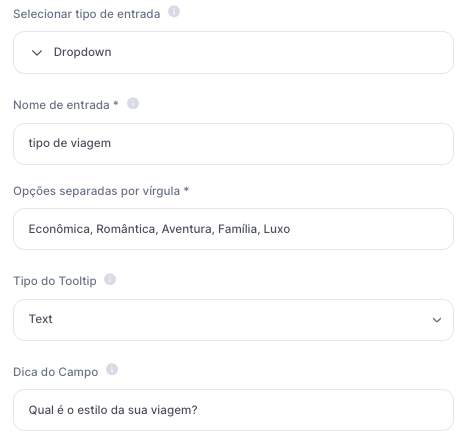
Input for Trip Type (Single Select): "Single Select" with the name trip type and label "What’s the style of your trip?". For the options, enter the list of choices separated by commas. E.g.: Budget, Romantic, Adventure, Family, Luxury
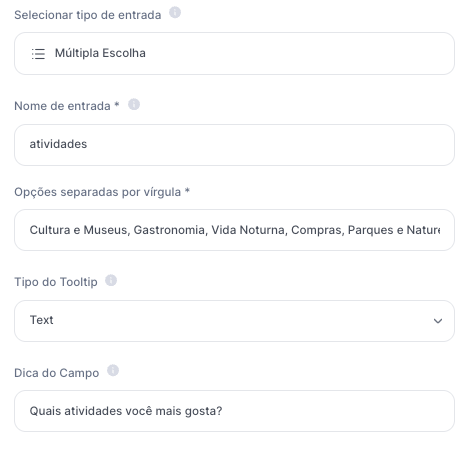
Input for Activities (Multi Select): "Multi Select" with the name activities and the label: "Which activities do you like the most?". For the options, enter the list of interests separated by commas. E.g.: Culture and Museums, Gastronomy, Nightlife, Shopping, Parks and Nature
Tip: Use the "+" button in the prompt editor to insert the variables into the prompt and ensure an exact match, referencing the variable in the training.
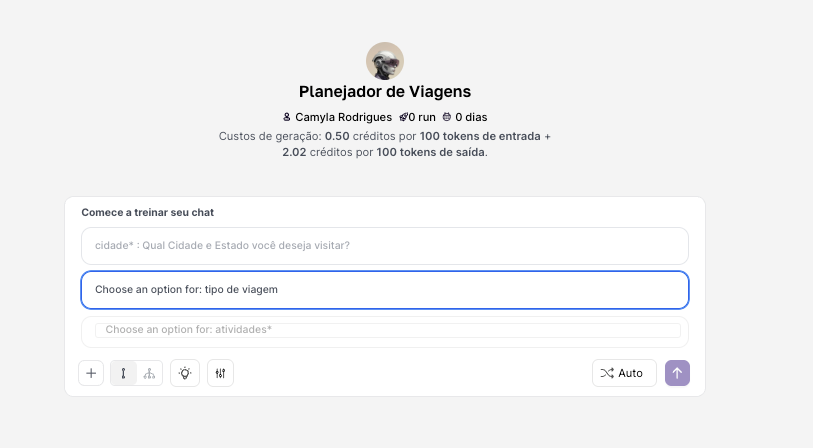
4. Saving and Testing
With everything set up, name your agent and click "Save" and then "Preview" to test. You’ll see a user-friendly interface with a text field, a dropdown menu, and checkboxes, ready to be filled in.
This tutorial shows how selection inputs can make your agents more structured, guiding the user and making sure you get the information the way you expect. Keep exploring and creating your agents!
