Tess AI's Inpaint feature gives you an easy way to edit images, swap elements, and change backgrounds with precision. This step-by-step guide will walk you through the whole process, from picking the AI model to explaining how the Mask function works.
Step 1: Picking the InPaint AI Model
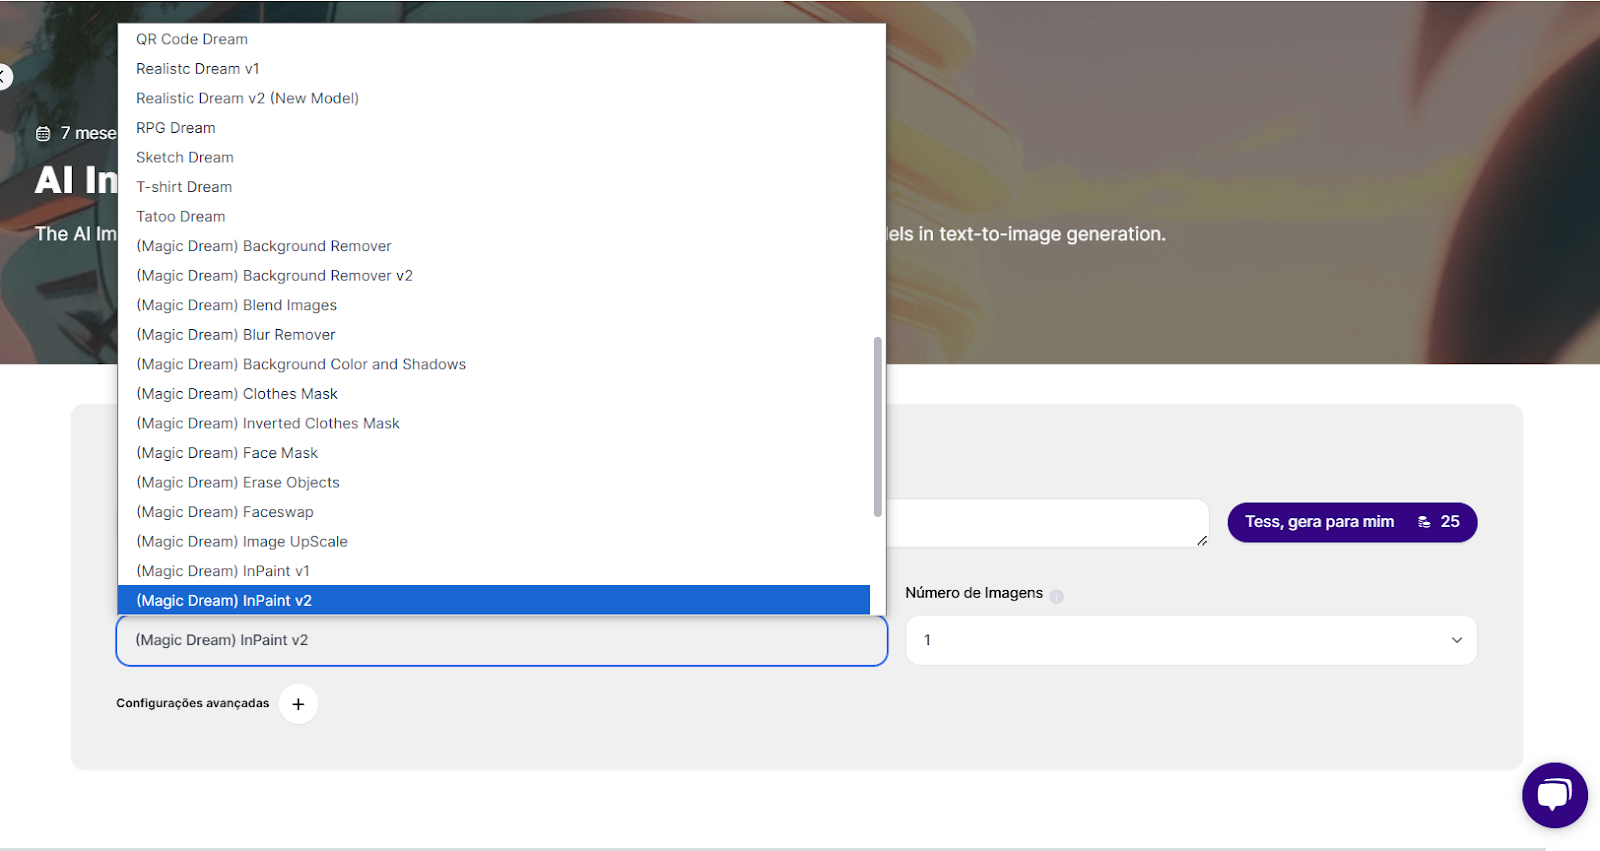
On Tess AI, you'll find a bunch of different image AI models, each one with its own specialties and abilities. The right model depends on the kind of editing you want to do. In this case, since we want to change elements in the image, we'll go for one of the InPaint options. To pick, use the Tess Model Selector.
Between the InPaint V1 and V2 models, the second one is the newest and usually gives better results.
Step 2: Picking Your Images
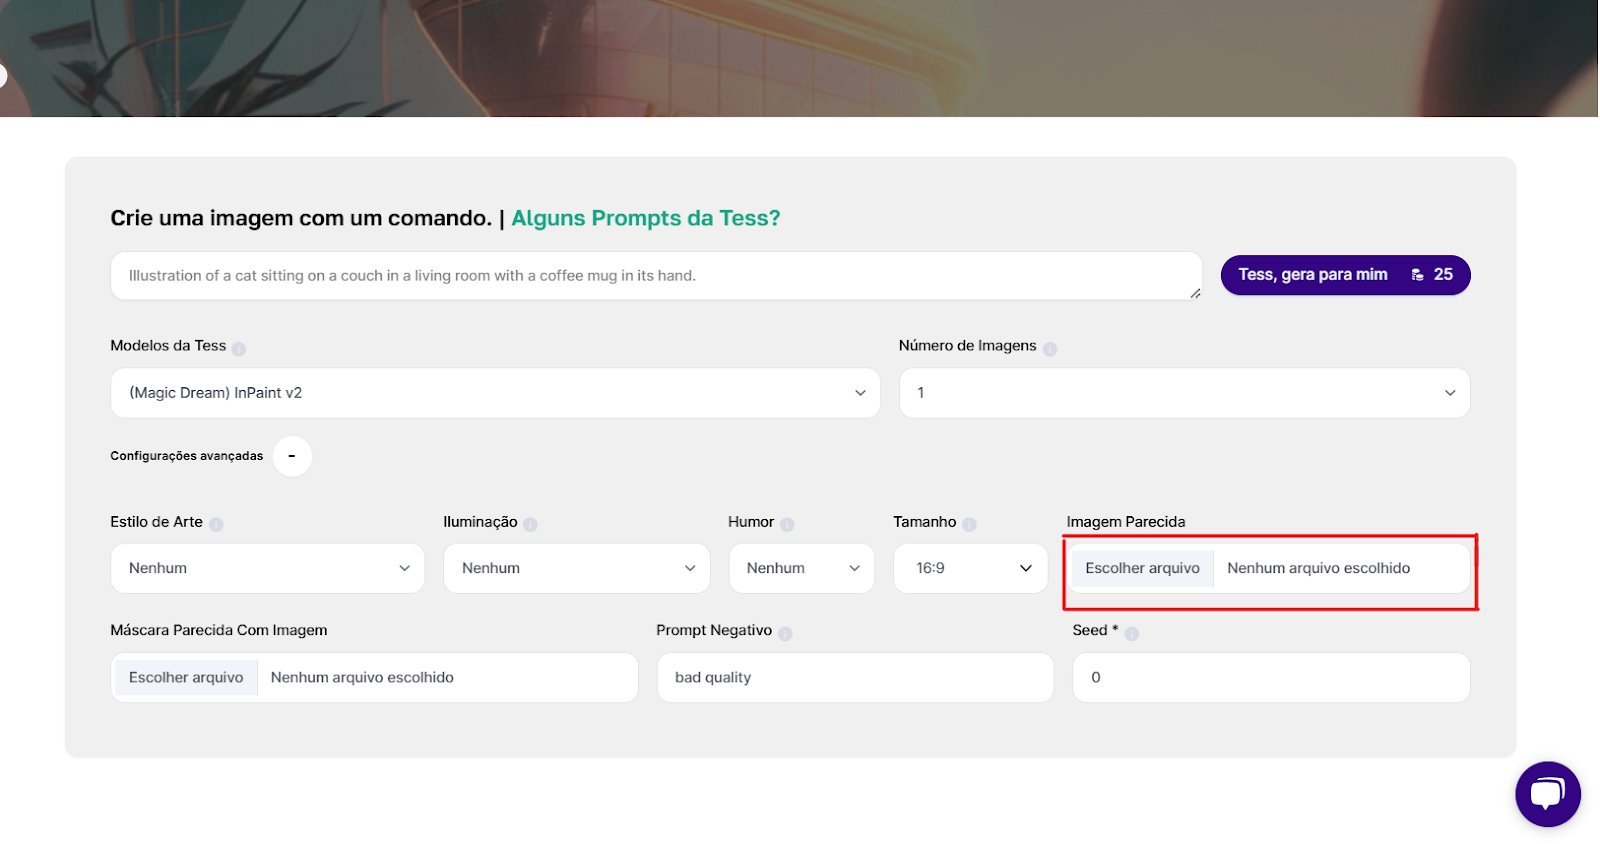
Once you've picked the model, import the image you want to edit. To do this, open the Advanced Settings panel and paste it into the “Similar Image” field. Tess supports different image sizes, but your inspiration image will be cropped to match the size you choose.
Step 3: Creating the Mask
You might notice that, besides the Similar Image field, Inpaint also has the “Similar Image Mask” field, which is going to be our main focus here.
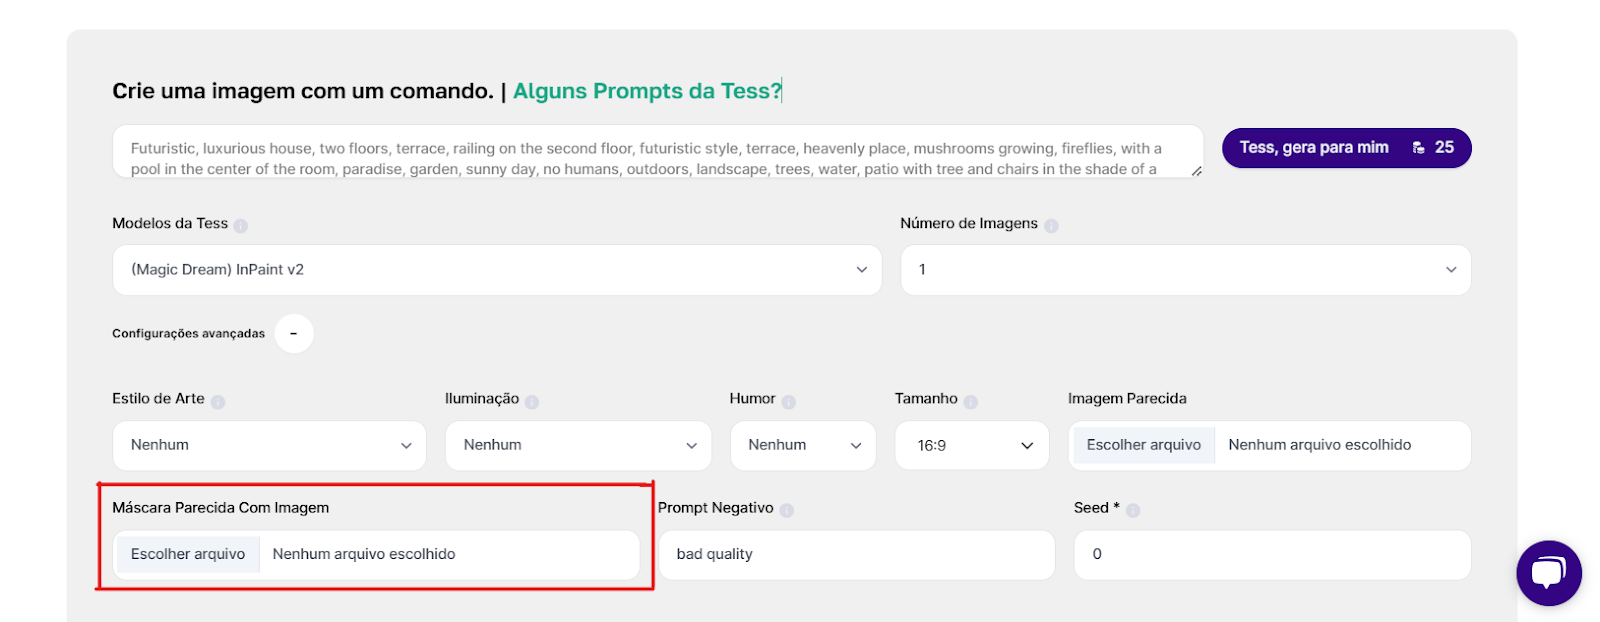
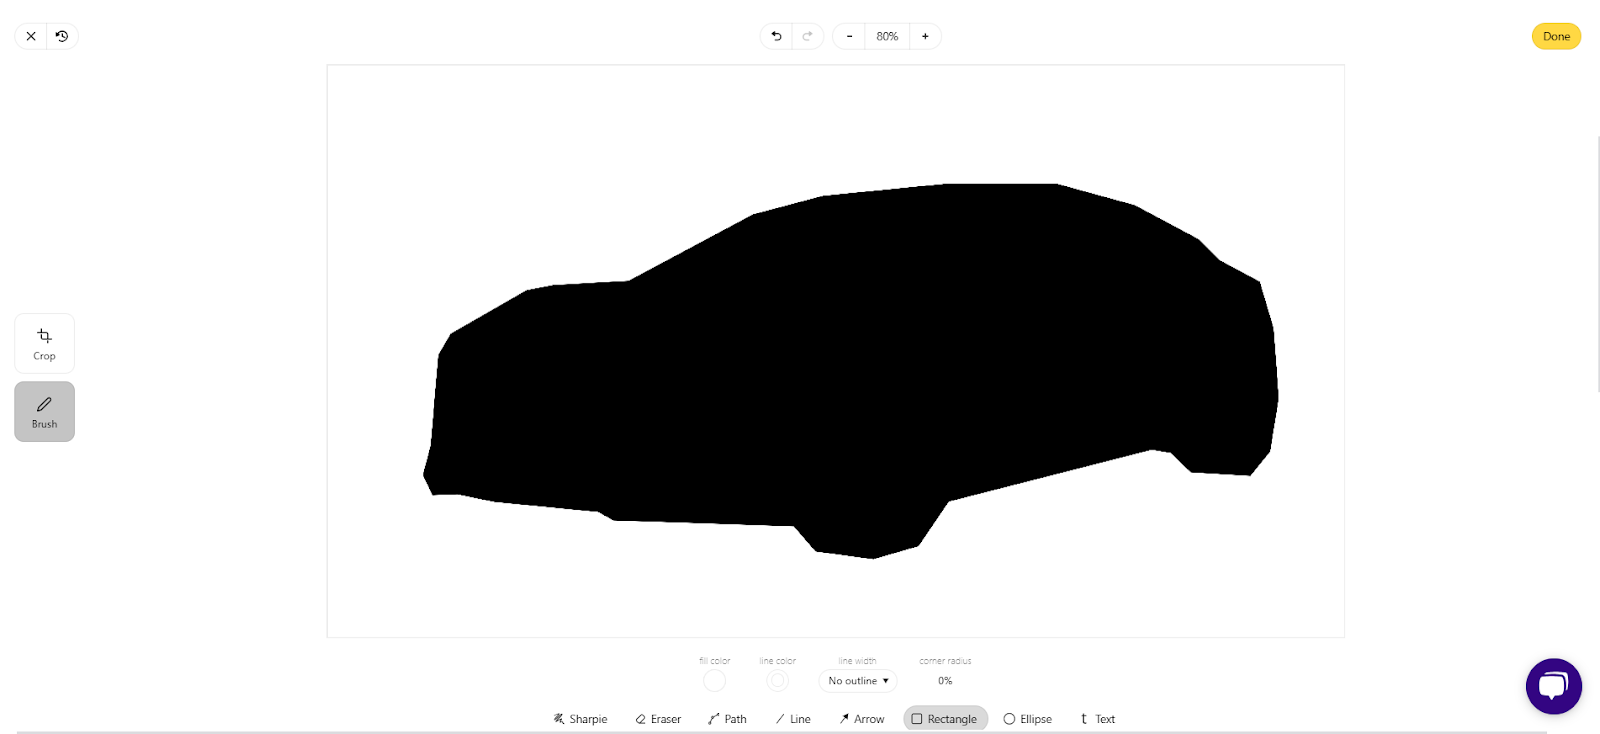
With the Mask, we’re going to define which areas of the image will be changed. Masks are made up of only two colors (black and white). White marks the area to be edited, and black keeps the area as it is. It’s this difference that we’ll make in our image.
Mark the Area You Want to Edit: Clearly define the area you want to change, whether it’s an object to remove, a damaged spot to fix, or a section to tweak, following the color tips above.
Use the Drawing Tools: Tess AI gives you drawing tools, like Path, for creating the mask by hand. Pick the color you want to use and outline the whole object. Color in white in the area you want to change. Then, using the brush, fill in the rest (the part you want to keep in the image)
Important: This will only apply to the image in the “Similar Image Mask” field. The image upload option called “Similar Image” will stay the same
The Mask creation process is shown in the following two images:
1- Select the part to keep (in black)
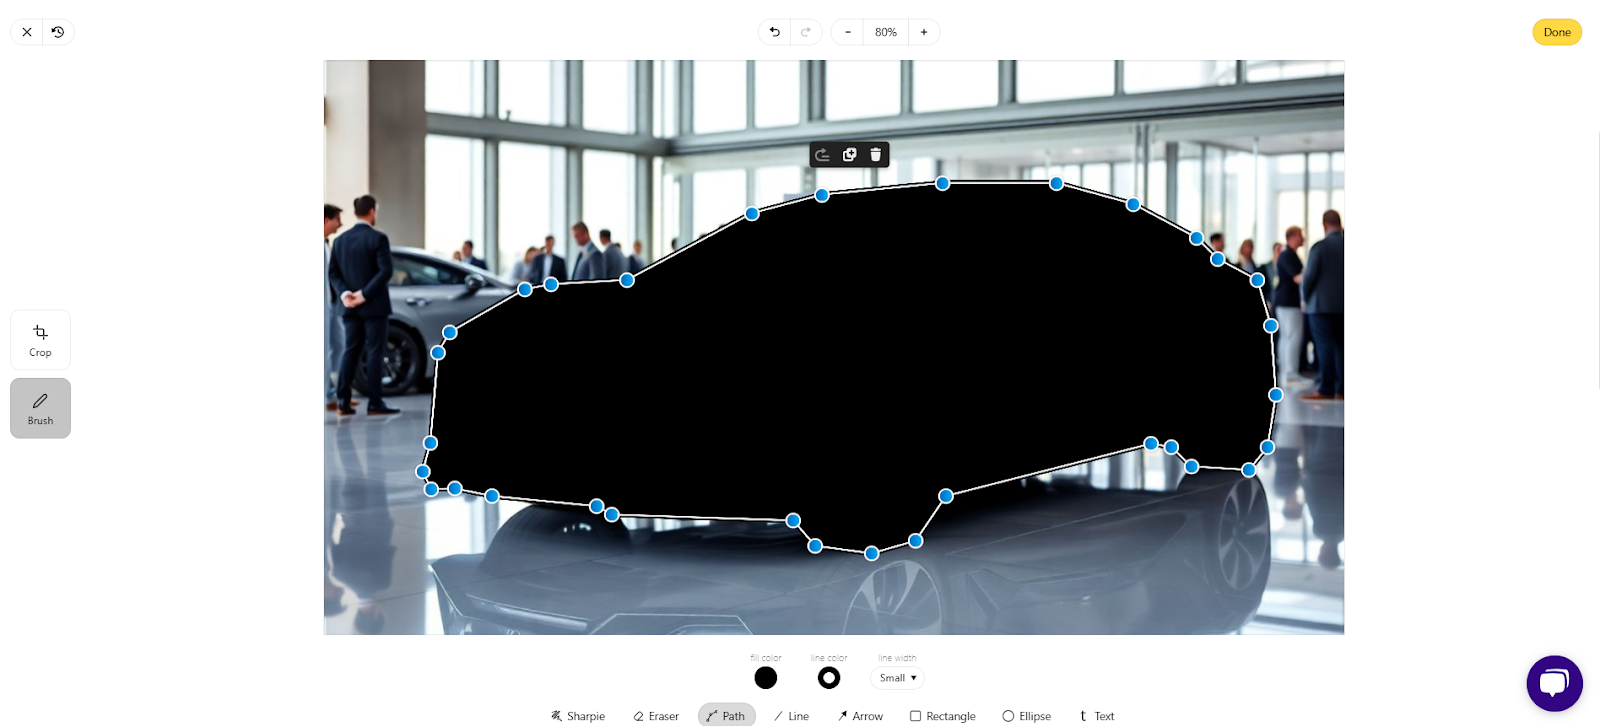
2- Select the part to change (in white)
Step 4: Structuring the Prompt
With the mask done, now we need to generate our image, and for that we'll use a prompt. The prompt is your instruction to the AI. It describes what you want to happen in the white selected area. Be clear and only describe what you want to replace.
Prompt example: Nighttime snowy street scene, high-resolution image, realistic style, main focus on a street decorated for Christmas, snow-covered pavement reflecting soft street lights, festive decorations like string lights and wreaths on lamp posts, a gentle snowfall adding a serene atmosphere, wide-angle view capturing the essence of a quiet holiday evening, photorealistic.
Final result:

We have an article in our Help Center focused specifically on creating Prompts. You can check it out here!
E-commerce: optimizing your showcase
Variations: swap mannequins and models to bring more variety to your product displays.
Different Scenarios: place your products in various scenes, customizing them for special promotions and holidays!
Design: make your creative process easier
Images your way: change elements to get the perfect result.
Flexibility: swap out components and create variations quickly and easily.
Marketing: winning over your audience
Targeted images: adapt your images for different audience segments to boost your campaign's impact and effectiveness!
Architecture: flawless presentations
Project customization: swap project elements to make your service look even better!
We showed some awesome examples of how to use InPaint, from e-commerce to architecture, but that's just the tip of the iceberg! This tool is powerful and versatile, and has so much more to offer. Thinking about making materials or giving your images a special touch? InPaint helps you do all that and then some! So many possibilities waiting to be explored!
With this guide, you're all set to use InPaint on Tess AI and transform your images with creativity and precision.
Remember, to create any other type of image, narration, or transcript, you can use the specific generators in Agent Studio or, if you prefer, look for an available use case in Tess's Marketplace!
